ud83dudcda Toilet Renovation Series u2014 3 of 25
u2190 Toilet Renovation Vol.2: Toilet Removal Pt.1 u00b7 Series Index u00b7 Toilet Renovation Vol.4: Toilet Removal Pt.3 u2192
u270fufe0f Originally published: January 4, 2017 / ud83dudd04 Rewritten: May 8, 2026
u270fufe0f 2026 Update from DIY Dad: The Full Picture of the Toilet Renovation
ud83duded2 RECOMMENDED PRODUCTS
Washlet Toilet Seats (Bidet)
A washlet seat is the single upgrade that impresses every tenant in Japan.
After the kitchen, it was on to the toilet. The toilet renovation sequence is: remove old toilet u2192 repair floor u2192 replace flooring u2192 finish walls u2192 install new toilet. The toilet removal itself turned out to be surprisingly heavy work! (Lol) ^ ^
What DIY Dad Did in the Toilet Renovation
ud83duded2 RECOMMENDED PRODUCTS
Toilet Repair Kits
Keep a repair kit stocked u2014 toilet calls come without warning at midnight.
- Toilet removal (broken down into 3 pieces: tank, seat, and main body)
- Floor repair (subfloor patching)
- Cushion floor replacement
- Wall finish (diatomite plaster)
- New toilet installation
- Water supply line and shutoff valve connection check
How to Remove a Tank-Type Toilet
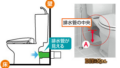
- Turn off the shutoff valve (turn clockwise with a flathead screwdriver)
- Empty water from the tank and bowl (scoop with a bucket and wipe dry with rags)
- Disconnect the water supply hose from the tank
- Unbolt the tank from the bowl body (2 bolts)
- Remove the toilet seat
- Unbolt the bowl body from the floor anchor bolts (2u20134 bolts)
- Lift and remove the bowl body (heavy! 20u201330 kg)
Lifting the bowl alone can hurt your back. DIY Dad always makes sure to have at least two people for this step. m(_ _)m
Handling the Drain Opening After Removal
ud83duded2 RECOMMENDED PRODUCTS
Toilet Accessories Sets
Matching accessories cost u00a52,000 and make a small toilet feel designed.
Once the toilet is removed, foul-smelling sewer gas rises up through the exposed drain pipe. Temporarily plug it with a plastic bag or rags. Forgetting this step makes working conditions miserable. (Lol)
As a Landlord: Comfort Is What Seals the Deal
After 15 years as a landlord, I can tell you that a toilet’s cleanliness and comfort are directly tied to whether people sign a lease. Replacing an old toilet with a brand-new one makes it noticeably easier to get applications u2014 even if you raise the rent by u00a53,000u20135,000/month.
A washlet (heated bidet seat) is non-negotiable. It’s the standard for rentals today. Properties without one simply don’t get picked. DIY Dad has installed washlets in every single one of his properties. ^ ^
ud83dudebd For Anyone Considering a Toilet Renovation
Even just replacing the toilet bowl can dramatically change the feel of the space. Going from a tank-type to a tankless toilet in this property gave the room a completely different sense of spaciousness. ^ ^
Water leaks and clogs get worse if ignored u2014 call a professional right away when trouble strikes.
24-Hour Emergency Plumbing Service u2014 Toilet & Water Trouble u00bb
![]()
Hi there, it’s DIY Dad. ^ ^
First day back at work in 2017. Gotta shake off that holiday haze! ^_^; Fresh mindset, let’s do this!!
Continuing on with the 1st-floor toilet renovation. Time to tackle removing the tank. I had previously consulted Google about how to install a toilet, but I completely forgot to look up how to remove one. (^u25c7^;) “Well, I guess it’s just the reverse of installing it” u2014 that was my carefree attitude going in. ^ ^
But honestly… touching someone else’s used toilet is just not something I want to do. ~_~; It’s gross and smelly, and honestly a little scary in terms of what might be lurking in there. But complaining doesn’t get anything done, so I pressed forward. (uffe3^uffe3)
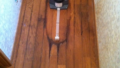
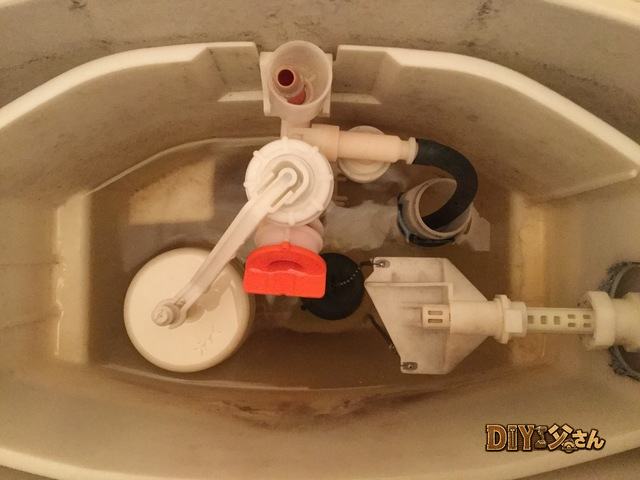
I put on rubber gloves and got to work. u0669( ‘u03c9’ )u0648 The toilet seat was already broken and falling apart, so I removed it without much care. Then I took the lid off the tank. Inside: just water. Nothing scary at all. DIY Dad breathed a quiet sigh of relief. u03b5-(u00b4u2200uff40; )
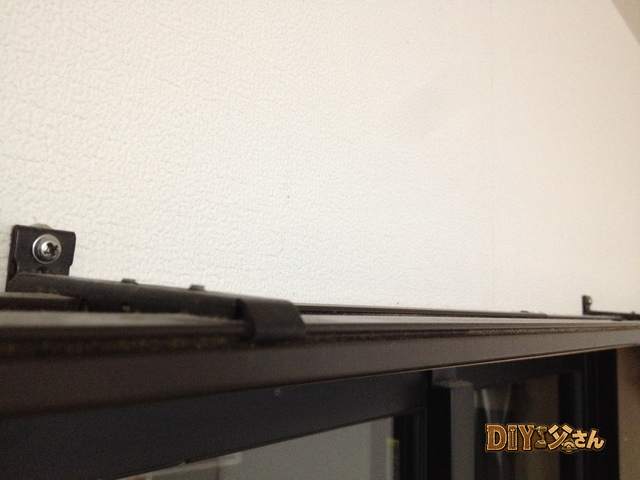
u2191 Inside the tank. I shut off the main water supply valve, then pulled the flush lever to drain the tank completely. Once the tank was empty, I disconnected the water supply hose. I had rags ready to catch any drips u2014 but the water inside the hose came out in a surprisingly large gush and I got soaked. There are two bolts connecting the tank to the bowl, located at the back of the bowl.
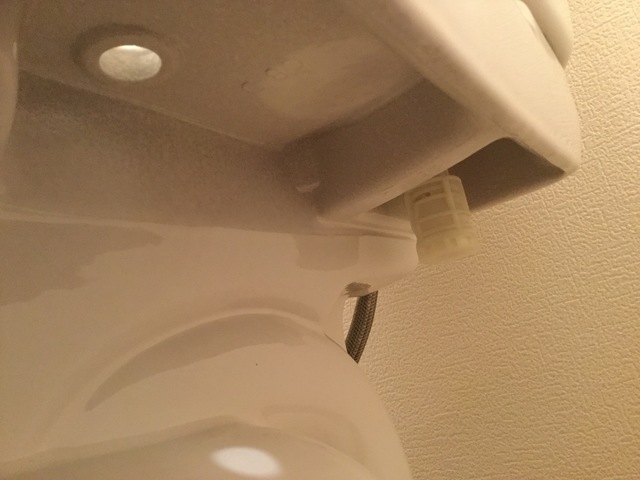
u2191 The connecting bolts. I removed the nuts and lifted the tank straight up. Tank off! ^ ^ Next up: the bowl itself. That’s all for today! (^^)/~~~
ud83dudcda Toilet Renovation Series u2014 3 of 25
u2190 Toilet Renovation Vol.2: Toilet Removal Pt.1 u00b7 Series Index u00b7 Toilet Renovation Vol.4: Toilet Removal Pt.3 u2192
DIY Renovation Quote Review Manual
How to read, compare, and negotiate contractor quotes. This manual saved me u00a5800,000 on a single renovation project.
ud83cudfe0 More from DIY Father
15 years of landlord experience u00b7 3 apartment buildings u00b7 DIY renovations that saved millions of yen. Browse all articles at diytosan.com