ud83dudcda Kitchen 2 Renovation Series u2014 11 of 45
u2190 Kitchen2 Vol.10: Silicone Caulk Removal u00b7 Series Index u00b7 Kitchen2 Vol.12: Sink Light Removal u2192
u270fufe0f Originally published: 2016-12-29 / ud83dudd04 Updated: May 8, 2026
- u270fufe0f 2026 Update from DIY Dad: Looking Back at the Kitchen Finishing Work
- Removing the Silicone Caulk
- Replacing the Single-Lever Faucet
- Removing and Reinstalling the Under-Sink Light
- Reinstalling the Ventilation Fan
- As a Landlord: Looking Back on the Completed Kitchen Renovation
- ud83cudf73 For Anyone Considering a Kitchen Renovation
- The Actual Faucet Removal Work
u270fufe0f 2026 Update from DIY Dad: Looking Back at the Kitchen Finishing Work
ud83duded2 RECOMMENDED PRODUCTS
Modern Kitchen Cabinet Handles
New handles cost u00a53,000u20138,000 and make a kitchen feel 10 years newer instantly.
We’ve reached the finishing stage of the kitchen renovation. The workflow goes: wallpaper removal u2192 silicone caulk removal u2192 faucet replacement u2192 under-sink light removal u2192 faucet installation u2192 ventilation fan reinstallation. Since this phase involves both plumbing and electrical work, getting the order right and staying safe is essential. ^ ^
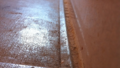
Removing the Silicone Caulk
ud83duded2 RECOMMENDED PRODUCTS
Kitchen Faucets
A faucet upgrade is the single highest-impact kitchen DIY per yen spent.
Old silicone caulk along kitchen tile and wall joints tends to discolor and grow mold over the years. Removing it and applying fresh caulk makes a dramatic difference in both waterproofing and appearance.
Tools for removal: a liquid caulk remover, or a combination of a utility knife and a caulk scraper. Apply the remover and let it sit for 30 minutes to an hour u2014 it softens the caulk and makes it much easier to pull away. m(_ _)m
Replacing the Single-Lever Faucet
Replacing a kitchen faucet is absolutely within DIY range. The two key points are: shut the stop valve completely, and confirm that the mounting hole diameter matches between old and new faucets.
Standard procedure for replacing a deck-mounted single-lever faucet:
- Step 1: Close the stop valves under the sink (both hot and cold)
- Step 2: Remove the nut securing the existing faucet
- Step 3: Disconnect the hot and cold supply hoses
- Step 4: Feed the new faucet through the mounting hole
- Step 5: Tighten the securing nut from below
- Step 6: Connect the hot and cold supply hoses
- Step 7: Open the stop valves and check for leaks
A faucet is one of those parts that can transform the entire feel of a kitchen. Swapping in a single-lever mixer faucet instantly gives you a functional, modern look. ^ ^
Removing and Reinstalling the Under-Sink Light
ud83duded2 RECOMMENDED PRODUCTS
Kitchen Backsplash Tile Kits
A tiled backsplash protects the wall and dramatically upgrades the kitchen appearance.
The fluorescent under-sink light (most kitchens have this type) must be removed before any wallpaper replacement. Just unscrew the mounting screws and wrap the wiring in electrical tape while it’s disconnected.
Upgrading to an LED version is a smart move for energy savings and longevity. As with the ventilation fan reinstallation covered later, any work involving electrical wiring requires a licensed electrician.
Reinstalling the Ventilation Fan
Reinstall the cleaned fan by reversing the disassembly steps. Always turn the circuit breaker OFF before doing this work.
If you hear unusual noise after reinstallation, the propeller may not be seated properly. Check that the propeller nut is fully tightened. DIY Dad noticed his was slightly loose during the final check and tightened it up. (lol)
As a Landlord: Looking Back on the Completed Kitchen Renovation
A kitchen with a new faucet, a clean ventilation fan, and fresh caulk u2014 the impression shifts completely from “old and dirty” to “clean and functional.”
Based on DIY Dad’s experience, the materials for a kitchen refresh package (wallpaper + cushion floor + faucet + ventilation fan cleaning) run about u00a580,000u2013u00a5120,000. A contractor would typically charge u00a5400,000u2013u00a5600,000 for the same scope, so the DIY savings are substantial. ^ ^
ud83cudf73 For Anyone Considering a Kitchen Renovation
The kitchen is the most challenging area in any renovation u2014 gas, electrical, and plumbing all converge here. DIY Dad’s rule is firm: gas equipment is always handled by a professional. It’s a matter of safety. (lol)
Visiting a showroom to see products in person saves you from the dreaded “this isn’t what I imagined” moment. Most showrooms are free to visit, so take advantage of them. ^ ^
![]()
Marutoku Shop u2014 Find wood and kitchen materials u00bb
The Actual Faucet Removal Work
Hi there u2014 DIY Dad here. ^ ^ My wife still hasn’t made a full recovery, so the trip back home is on hold for now. ^_^; To make things worse, whatever bug got her decided to target our little general too! u03c8(uff40u2207u00b4)u03c8 The kid who’s usually so loud you can’t get a word in edgewise went completely quiet. Even the little general couldn’t beat this one. The thermometer read nearly 39u00b0C u2014 a serious fever. u03a3(u30fbu25a1u30fbuff1b) So much for driving home. DIY Dad can only pray for the family’s recovery. (u00b4uff70uff40)
Continuing with the 1F kitchen renovation. Following the silicone caulk removal, we now remove the single-lever mixer faucet. Tools used: water pump pliers, screwdriver.
Use a screwdriver to close the main water shutoff valve. Then loosen the screw on the front face of the single-lever faucet.
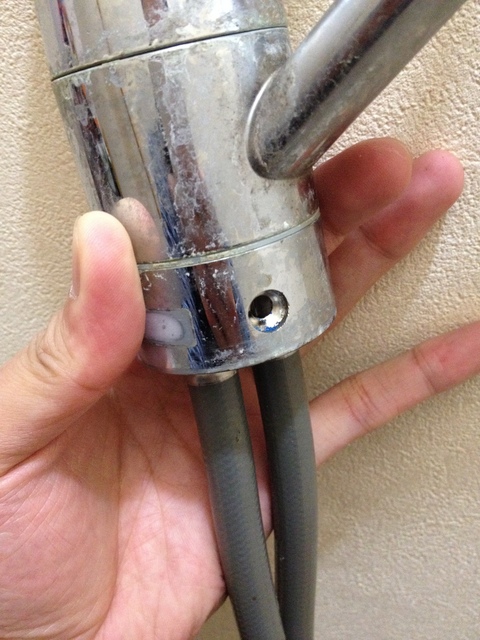
u2191 The front screw location.
Protect the hot and cold supply pipes with a towel. Since the connections use push-fit fittings, just pull them straight out.
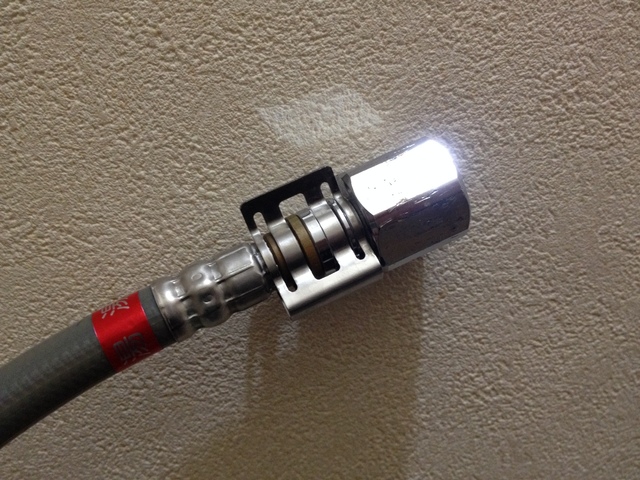
u2191 The push-fit connector.
Remove the retaining clip.
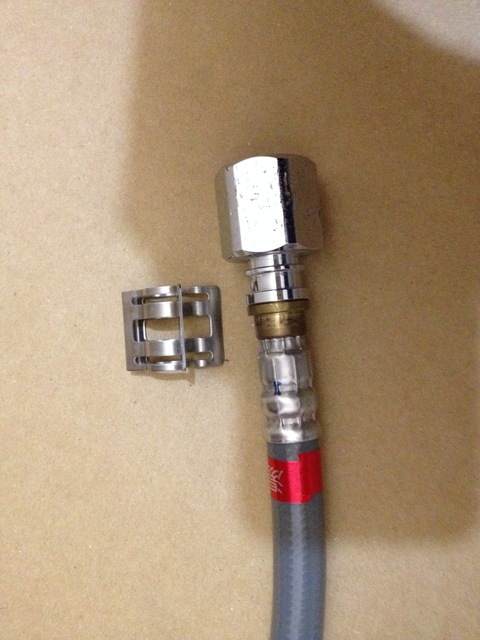
u2191 The retaining clip.
Pull the fitting out.

u2191 The connector.
Stick your head under the cabinet and loosen the mounting hardware nut from below.
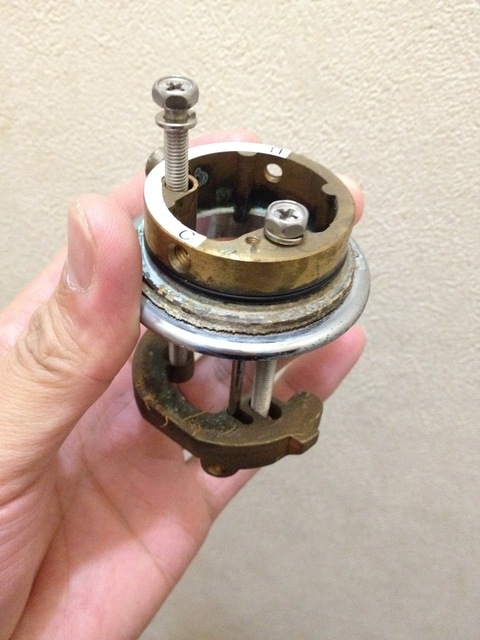
u2191 The mounting bracket.
Use water pump pliers to remove the sockets at the base of the hot and cold supply pipes.
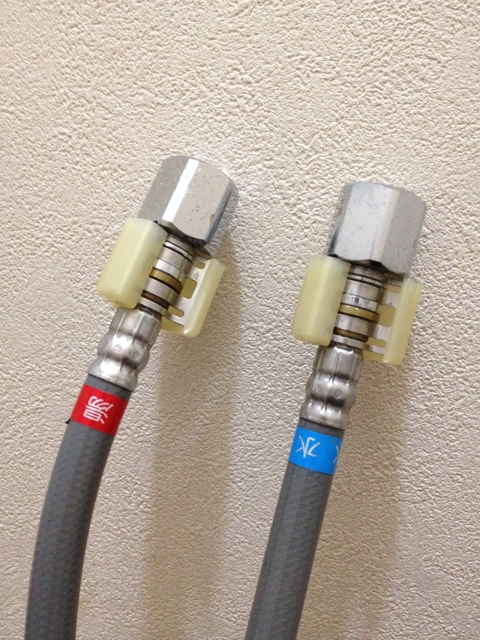
u2191 The hot and cold supply pipes.
Lift the faucet body straight up and out.
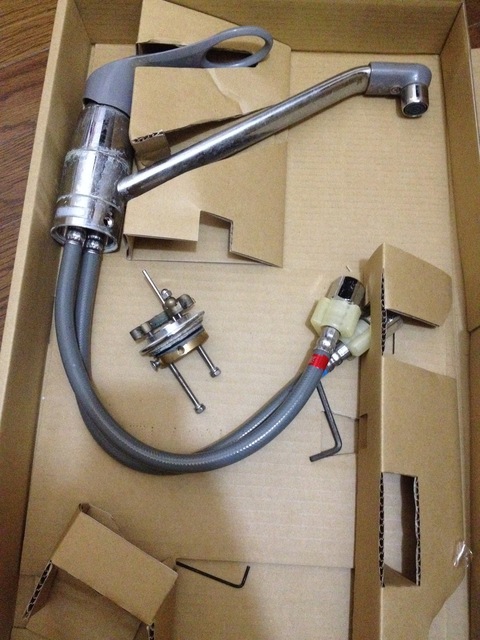
u2191 The removed faucet.
That’s it for today! (^^)/~~~
ud83dudcda Kitchen 2 Renovation Series u2014 11 of 45
u2190 Kitchen2 Vol.10: Silicone Caulk Removal u00b7 Series Index u00b7 Kitchen2 Vol.12: Sink Light Removal u2192
DIY Renovation Quote Review Manual
How to read, compare, and negotiate contractor quotes. This manual saved me u00a5800,000 on a single renovation project.
ud83cudfe0 More from DIY Father
15 years of landlord experience u00b7 3 apartment buildings u00b7 DIY renovations that saved millions of yen. Browse all articles at diytosan.com