ud83dudcda Apt.1 Kitchen Series u2014 6 of 10
u2190 Apt.1 Kitchen Wall Vol.5: Covering Up u00b7 Series Index u00b7 Apt.1 Kitchen Wall Vol.7: Paint & Wallpaper u2192
2026 Update from DIY Dad: Kitchen Wall Finishing and Joinery Work
ud83duded2 RECOMMENDED PRODUCTS
Modern Kitchen Cabinet Handles
New handles cost u00a53,000u20138,000 and make a kitchen feel 10 years newer instantly.
The 1st-floor kitchen wall repair is complete, and we move on to finishing the 2nd-floor Japanese room walls and joinery. Apartment #1’s renovation is steadily approaching the finish line.
Choosing a Finish Coat for the Kitchen Walls
ud83duded2 RECOMMENDED PRODUCTS
Kitchen Faucets
A faucet upgrade is the single highest-impact kitchen DIY per yen spent.
Key points for selecting kitchen wall finish materials:
Wallpaper option:
- Choose wallpaper with a stain-resistant coating (easy to wipe off grease)
- Mold-resistant type is ideal for the humid kitchen environment
- White or light colors (cleaner look and lets you spot dirt early)
Paint option:
- Use water-based paint rated for kitchens and bathrooms (mold-resistant and water-resistant)
- Glossy finish makes it easier to wipe off dirt
- Near the stove, kitchen panels are also an option
From a rental cost-management perspective, DIY Dad went with a wallpaper finish.
2nd-Floor Japanese Room Wall Repair Complete (Vol.11: Wallpapering)
The long-running 2nd-floor Japanese room wall repair is finally done. From the underlayer work in Vol.1 all the way to wallpapering u2014 a complete 11-part series.
Post-completion checklist:
- Are the wallpaper seams invisible? (check with angled light)
- Are the corners neatly finished?
- Are the cutouts around switches and outlets accurate?
- Is air fully pressed out so the paper adheres evenly?
- Are the ceiling/floor borders (baseboard, crown molding) tidy?
The sense of achievement when you see the finished room is something else. That “I did it myself” satisfaction is what keeps DIY going.
Joinery Work (Fusuma, Shoji, and Doors)
ud83duded2 RECOMMENDED PRODUCTS
Kitchen Backsplash Tile Kits
A tiled backsplash protects the wall and dramatically upgrades the kitchen appearance.
Joinery is as important as walls, ceilings, and floors in transforming a room’s impression.
Joinery work in the 2nd-floor Japanese room:
- Fusuma: apply new fusuma paper over existing frames
- Shoji: replace shoji paper (or convert to wallpaper finish)
- Wallpaper finish on door frames for a unified look
Old fusuma look as good as new with just a paper replacement. Fusuma paper starts from around 500 yen per sheet u2014 very affordable.
How to Replace Fusuma Paper
- Remove existing paper (moisten with water to make peeling easier)
- Inspect and repair the wooden frame
- Wet the new fusuma paper (for water-adhesive type)
- Apply from center outward, pressing out air
- As it dries, the paper tightens for a clean finish
Iron-on fusuma paper is easier for beginners and harder to mess up. Available at home improvement stores.
Cost-Effectiveness of Joinery Work
- Fusuma paper (4-sheet set): 2,000u20133,000 yen
- Shoji paper (1 room): 1,000u20132,000 yen
- Door paint: just the cost of paint (1,000u20132,000 yen)
Around 5,000u20137,000 yen in materials can dramatically change the look of an entire room. In terms of renovation ROI, it’s among the best DIY projects out there.
For Landlords Thinking About Apartment Renovation
“Cost-effectiveness” is the top priority in apartment renovation. DIY Dad handles the work himself to dramatically cut costs.
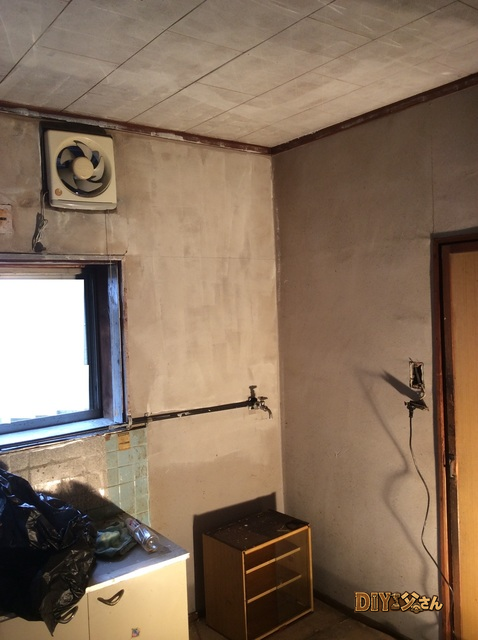
Hi, it’s DIY Dad.
We’re renovating the bay-window counter area in the kitchen.
Last time, we finished the counter underlayer and partition wall trim.
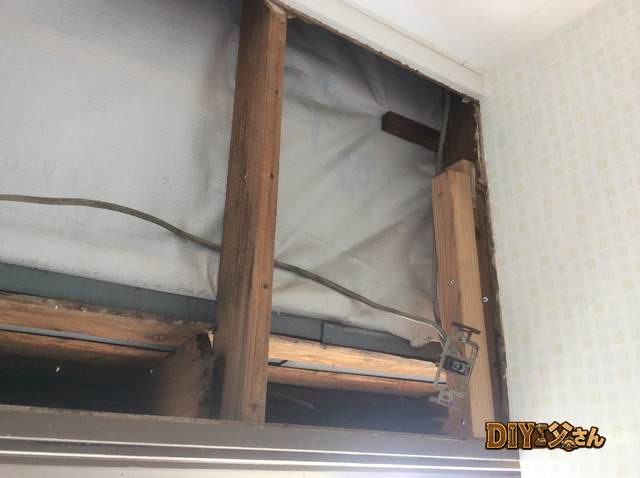
Now it’s time to restore the wall around the ventilation fan.
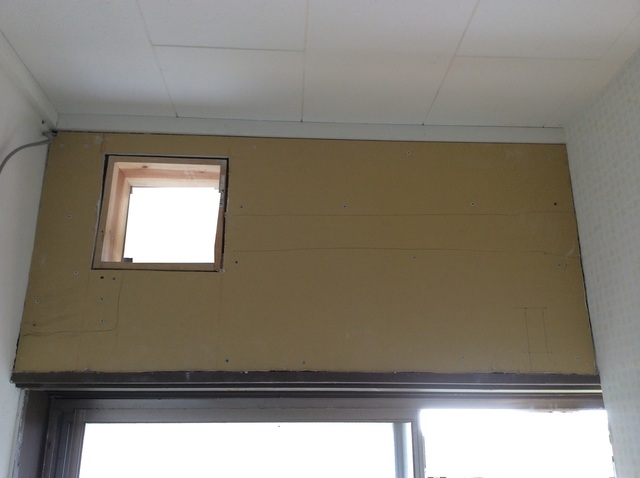
First, we build the underlayer with plywood.
The plywood goes into the studs, but the edges have no studs, so we pre-attach some timber first.
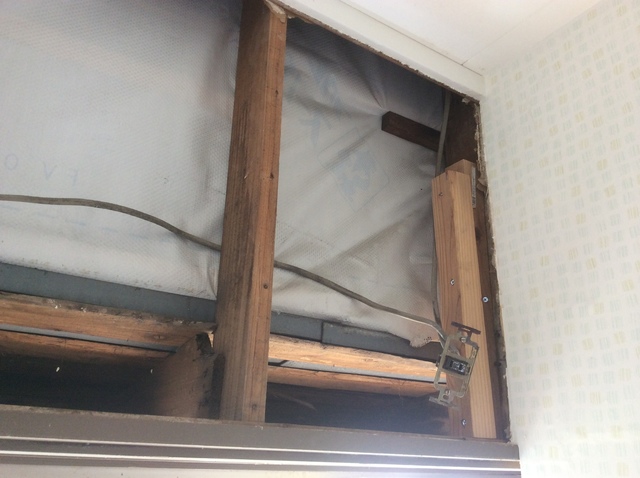
u2191 Timber blocking

u2191 Wall underlayer
u2191 Wall underlayer
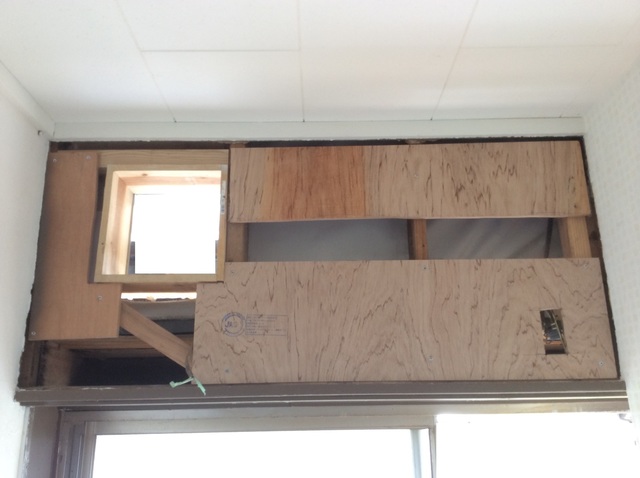
We’ll apply plasterboard over this.
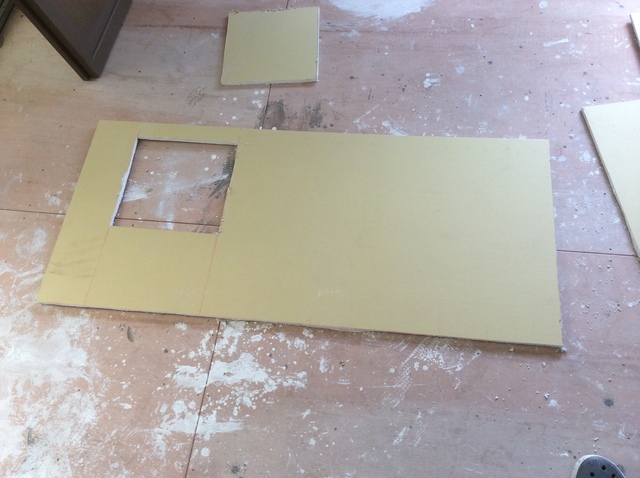
We transfer the shapes of the ventilation fan and outlets onto the overlay panel.
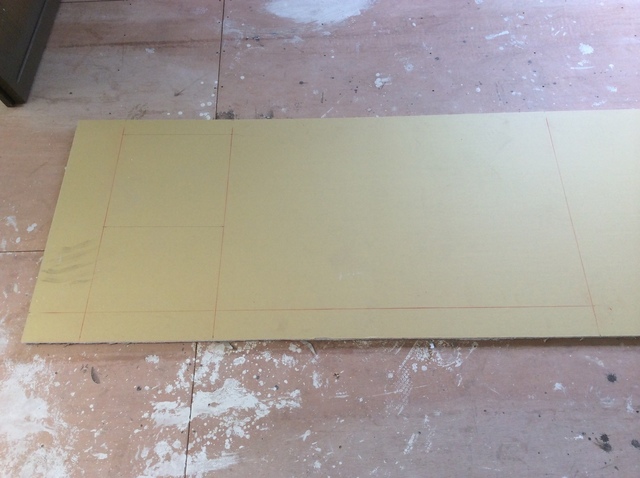
u2191 Underlayer material u2014 plasterboard
u2191 Underlayer material u2014 plasterboard
Applying it.
u2191 Wall underlayer

u2191 Wall underlayer
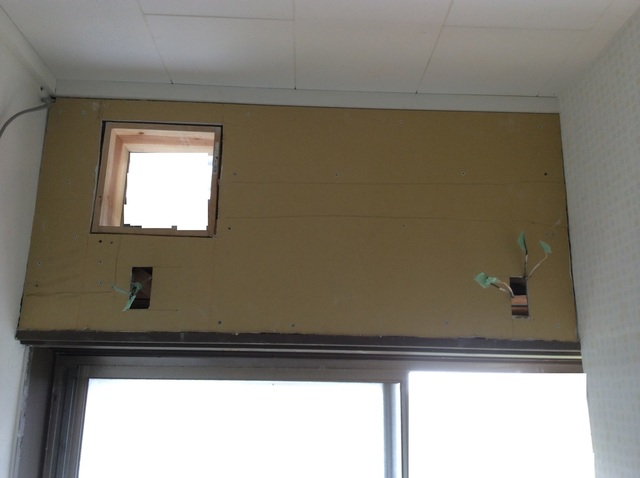
u2191 Wall underlayer
Next, we apply plasterboard to the top panel of the counter.

u2191 Counter top panel
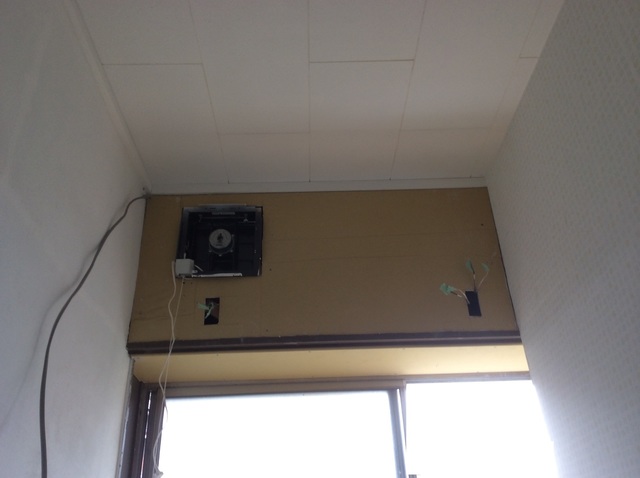
u2191 Wall underlayer
The underlayer is mostly done.
That’s it for today u2014 see you next time!
ud83dudcda Apt.1 Kitchen Series u2014 6 of 10
u2190 Apt.1 Kitchen Wall Vol.5: Covering Up u00b7 Series Index u00b7 Apt.1 Kitchen Wall Vol.7: Paint & Wallpaper u2192
DIY Renovation Quote Review Manual
How to read, compare, and negotiate contractor quotes. This manual saved me u00a5800,000 on a single renovation project.
ud83cudfe0 More from DIY Father
15 years of landlord experience u00b7 3 apartment buildings u00b7 DIY renovations that saved millions of yen. Browse all articles at diytosan.com