ud83dudcda Apt.1 Toilet Series u2014 1 of 6
u2190 (first article) u00b7 Series Index u00b7 Apt.1 Toilet Vol.2: Entrance, Wall & Floor Base u2192
u270fufe0f Originally published: 2021-11-04 / ud83dudd04 Updated: May 8, 2026
2026 Update from DIY Dad: Floor Finish, Kitchen Removal & Toilet Demolition
ud83duded2 RECOMMENDED PRODUCTS
Washlet Toilet Seats (Bidet)
A washlet seat is the single upgrade that impresses every tenant in Japan.
The 1st-floor flooring renovation is done, and now I’m moving on to replacing the kitchen fixtures and demolishing the toilet. The Apt.1 1st-floor renovation is really ramping up now. ^ ^
Closet Floor Overlay (Final Touch on the Floor Renovation)
ud83duded2 RECOMMENDED PRODUCTS
Toilet Repair Kits
Keep a repair kit stocked u2014 toilet calls come without warning at midnight.
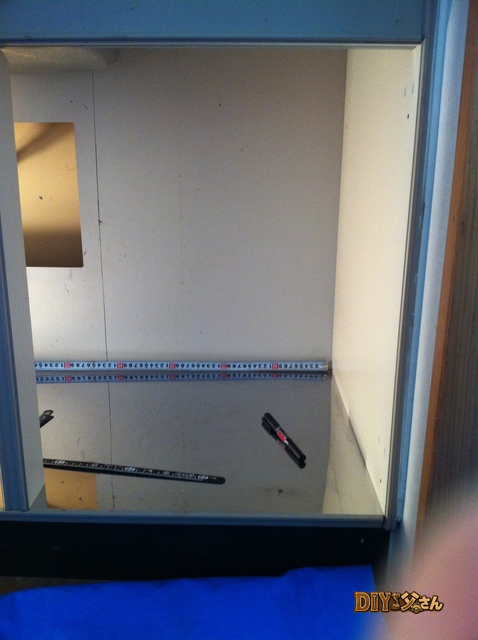
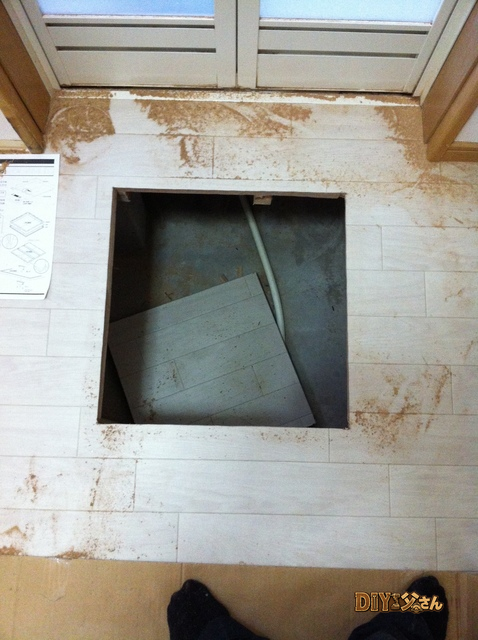
The closet floor is easy to overlook, but it affects the look and cleanliness when tenants store belongings.
Closet Floor Overlay Steps
- Check the existing floor condition (look for rot and mold)
- Cut plywood (5.5u20139 mm) to fit the closet
- Glue the plywood over the existing floor (double-sided tape or adhesive)
- Finish the surface with vinyl sheet or paint (optional)
Simply refreshing the closet floor gives tenants the impression of “a well-maintained apartment.” Attention to detail like this drives better occupancy. m(_ _)m
How to Remove Old Kitchen Fixtures
Removing an old kitchen (sink unit + stove cabinet) takes more work than you’d expect:
- Close the shutoff valves on the cold and hot water lines
- Disconnect the drain trap (watch for water spills)
- For gas stoves: close the gas valve (may require a licensed professional)
- Remove the screws and fasteners from the kitchen unit
- Dispose of the materials properly (as industrial waste)
Water supply and gas work may require licensed professionals. In particular, I’d recommend leaving gas line disconnections to a licensed contractor or professional. m(_ _)m
Why DIY Kitchen Replacement Makes Sense
ud83duded2 RECOMMENDED PRODUCTS
Toilet Accessories Sets
Matching accessories cost u00a52,000 and make a small toilet feel designed.
A contractor might charge u00a5500,000u2013u00a51,500,000 including labor. Doing it yourself means:
- System kitchen unit: u00a5100,000u2013u00a5300,000
- Removal cost: u00a50 (you do it yourself)
- Installation: hire out plumbing & gas; do the rest yourself
A “hybrid” approach u2014 hiring out just the licensed work and doing everything else yourself u2014 can slash costs dramatically. ^ ^
Toilet Demolition Basics
Removing an old toilet bowl is something a regular homeowner can handle:
- Close the shutoff valve (stop the water supply to the tank)
- Empty the tank (flush to drain it)
- Disconnect the supply line
- Remove the flange bolts connecting the bowl to the floor
- Lift and remove the bowl (it’s heavy u2014 two people is safer)
Odor can rise from the open drain pipe, so block it with a rag or masking tape right after removal. DIY Dad forgot to do this and regretted it. (Ha!)
![]()
Hello, I’m DIY Dad. ^ ^
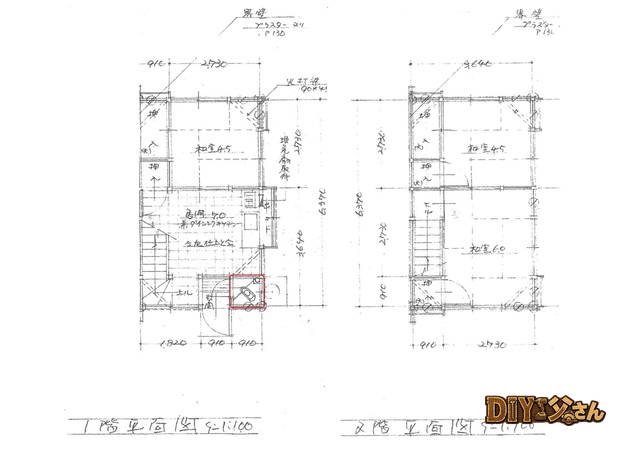
This is the 1st-floor toilet renovation. For the toilet work specifically, I outsourced the removal of the old squat toilet, chipping out the concrete slab, pouring new concrete, framing the wall and floor substrate, and rerouting the toilet drain piping.
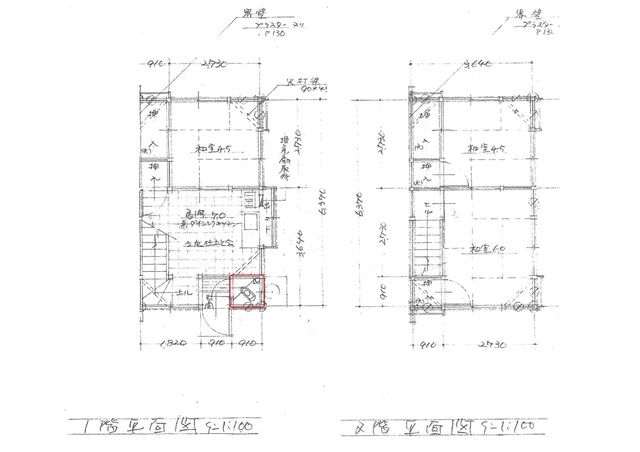
u2192 Floor plan u2014 1st-floor toilet (marked in the red box)
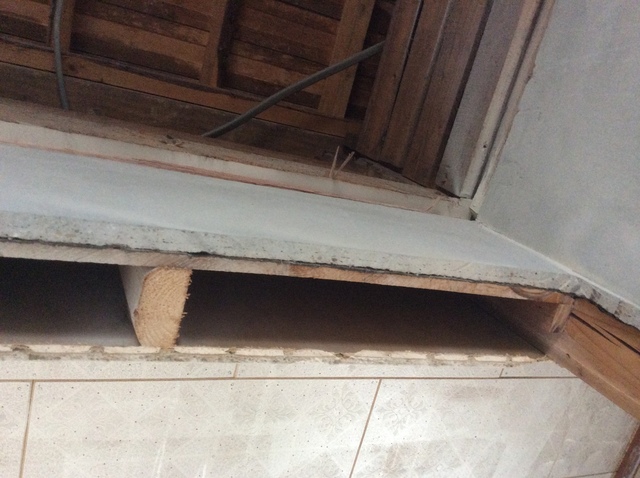
Here’s what it looked like before demolition:
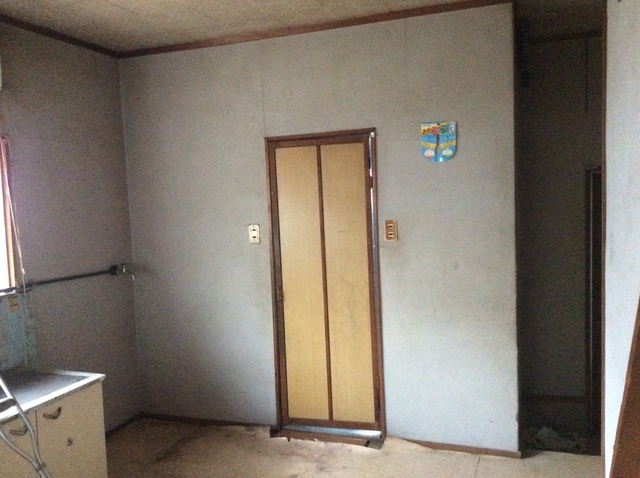
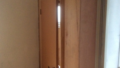
u2192 The wall that would become the toilet entrance
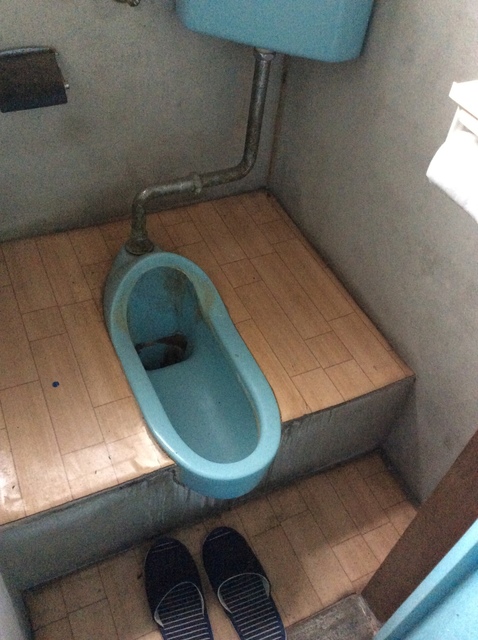
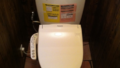
u2192 Before toilet removal
The toilet was only accessible from inside the bathroom u2014 way too inconvenient. So I broke through the kitchen wall to create a proper entrance. Then I removed the toilet, chipped out the concrete slab, and exposed the drain pipes. Nearly a complete gut-out u2014 only the drain pipes were kept.
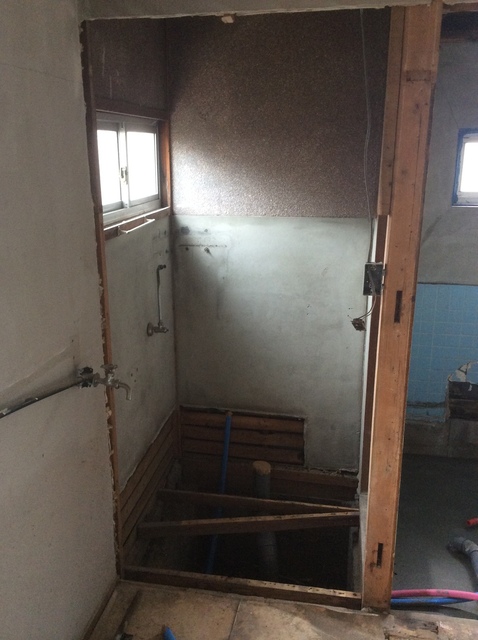
u2192 After demolition
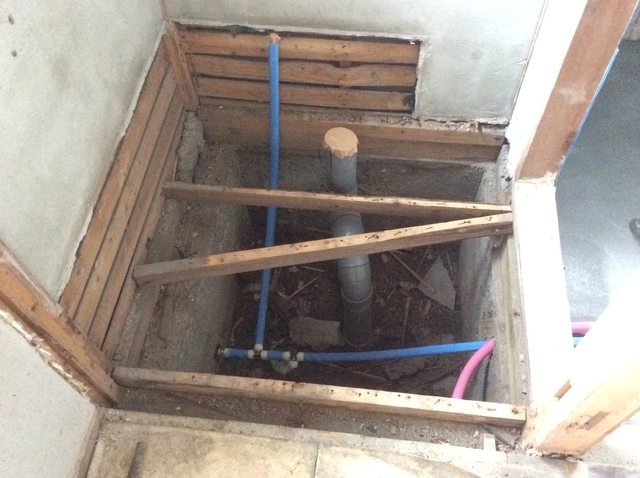
u2192 After demolition
u2192 After demolition
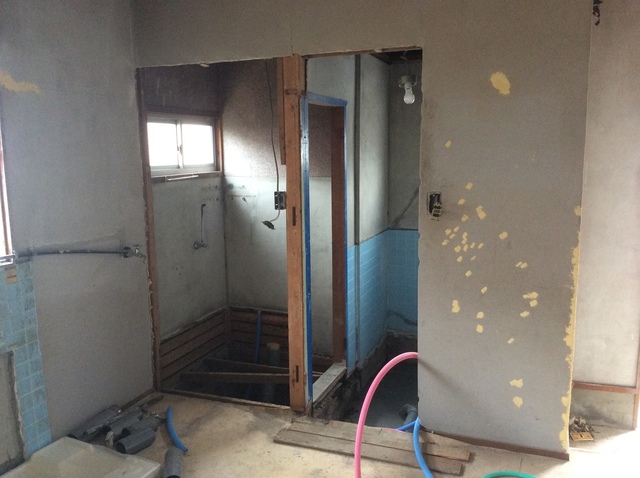
u2192 After demolition
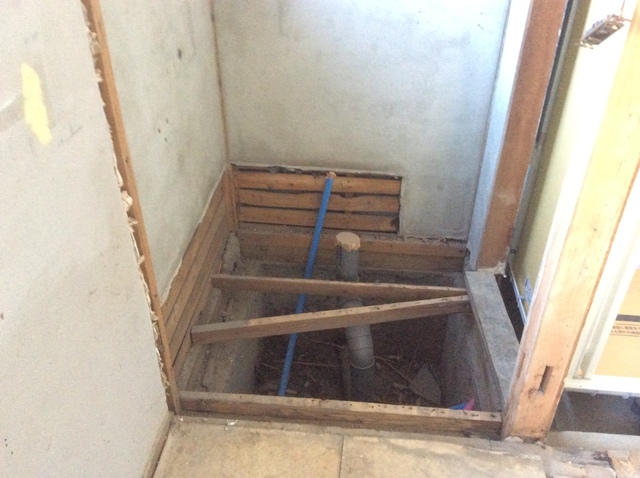
u2192 After demolition
That’s all for today! (^^)/~~~

ud83dudcdd DIY Dad’s Premium note Article
Real-Data Cost & Timeline Database for DIY Renovation
u00a5500
ud83dudcda Apt.1 Toilet Series u2014 1 of 6
u2190 (first article) u00b7 Series Index u00b7 Apt.1 Toilet Vol.2: Entrance, Wall & Floor Base u2192
DIY Renovation Quote Review Manual
How to read, compare, and negotiate contractor quotes. This manual saved me u00a5800,000 on a single renovation project.
ud83cudfe0 More from DIY Father
15 years of landlord experience u00b7 3 apartment buildings u00b7 DIY renovations that saved millions of yen. Browse all articles at diytosan.com