ud83dudcda Living Room Renovation Series u2014 18 of 20
u2190 Living Room Renovation Vol.17: Ceiling Fan Installation u00b7 Series Index u00b7 Living Room Renovation Vol.19: Air Conditioner Install Pt.2 u2192
u270fufe0f Originally published: 2016-12-18 / ud83dudd04 Rewritten: May 8, 2026
- 2026 Update from DIY Dad: Finishing Touches on the Living Room
- Door Adjustment After Wallpaper Work
- Replacing a Video Door Phone (Intercom)
- Ceiling Fan Installation Notes
- The Hardest Part of DIY Air Conditioner Installation: Flare Forming
- What I Took Away from Finishing the Living Room
- For Wall Materials and Lumber
2026 Update from DIY Dad: Finishing Touches on the Living Room
ud83duded2 RECOMMENDED PRODUCTS
Cordless Drill & Driver Kit
The single most-used tool across 15 years of rental property repairs.
The back half of the living room series covered door adjustments, switch reinstallation, intercom replacement, ceiling fan, and air conditioner u2014 a run of electrical-heavy work. As a mechanical designer I kept telling myself “understanding how electricity works means nothing to fear” u2014 but every first-time task still made my heart race.
Door Adjustment After Wallpaper Work
ud83duded2 RECOMMENDED PRODUCTS
Complete Home Repair Tool Set
A complete kit beats buying individual tools every time u2014 cheaper and always ready.
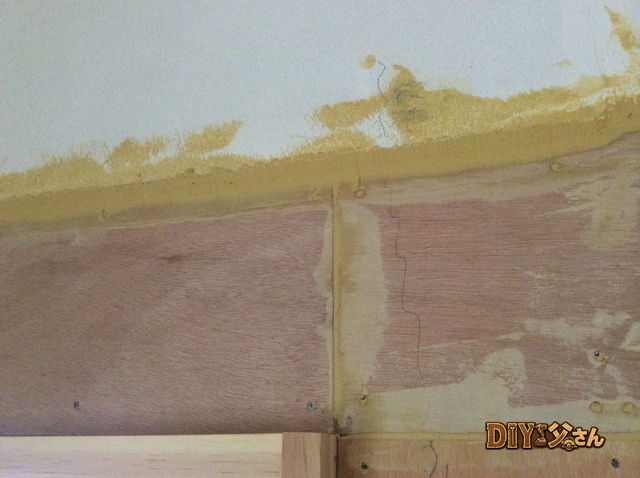
Replacing wallpaper sometimes changes how interior doors sit in their frames. The fix is simple: loosen the hinge screws and nudge the door position. In most cases, slightly shifting the top and bottom hinges is all it takes.
Replacing a Video Door Phone (Intercom)
When replacing a video door phone, think of it as a three-piece set: indoor unit, outdoor unit, and power adapter. If you’re reusing existing wiring, first confirm the wire count and type u2014 2-wire or 4-wire systems u2014 before buying a replacement.
DIY Dad’s process:
- Check the make and model of the existing units and the wire count
- Choose a compatible new unit
- Connect using the existing wires
- Test: camera image, two-way audio, door release function
A 2-wire system keeps the connections simple and is the most DIY-friendly option.
Ceiling Fan Installation Notes
ud83duded2 RECOMMENDED PRODUCTS
Adhesives & Sealants
Keep a stock of these u2014 you’ll use them on every single repair job.
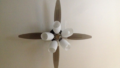
Ceiling fans are heavy u2014 typically 10u201315kg u2014 so ceiling reinforcement is essential. Without it, the fan can eventually pull free and fall.
You’ll also need to confirm whether the fan connects via a ceiling rose (pull-cord adaptor) or direct wiring. Direct-wired installations may require an electrician’s license. DIY Dad chose a ceiling-rose type and did it himself.
The Hardest Part of DIY Air Conditioner Installation: Flare Forming
The trickiest step in a self-installed air conditioner is forming the flare on the copper refrigerant line. You flare the end of the tube into a bell shape so it seals tightly against the fitting u2014 get this wrong and refrigerant leaks out, and the unit won’t cool.
A flare forming tool rents for around 2,000u20133,000 yen per day. Rent a vacuum pump at the same time and pull vacuum for at least 30 minutes u2014 this is non-negotiable. Patience during the vacuum pull is the single biggest factor in a successful DIY air conditioner installation.
What I Took Away from Finishing the Living Room
The sense of accomplishment when the living room was done was something else. Roof leak repair, wallpaper, flooring, ceiling fan, air conditioner u2014 all done myself. The best part was when the next tenant said “this living room is so bright and comfortable.” DIY renovation takes time, but it connects directly to the smiles of the people who live in the space.
For Wall Materials and Lumber
Online sourcing often yields better quality than local home improvement stores.
Hey there u2014 DIY Dad here.
Continuing the first-floor living room renovation series.
The ceiling fan with light is up, so now it’s time to install the air conditioner. The living room unit is brand new, but the units for the Japanese-style room and the upstairs bedroom are salvaged from my previous apartment u2014 we’re still living there before the move.
I rented a vacuum pump and flare forming tool for this job. Since rental is charged per period rather than per unit, I’m going to install all three air conditioners before the rental period ends.
That means first retrieving the units from the apartment. Here’s where things got interesting.
I had been living on the second floor of that apartment u2014 which means the outdoor units were on an exterior platform on the second floor. The original installation was done by a professional who arrived in what I assume was a bucket truck. I don’t have that kind of budget.
What I do have is single-pipe scaffolding (tanku0430u043d pipe), which I was already planning to use for a covered deck project. If I assembled a temporary scaffold, I could reach the second-floor units.
Important note: this is extremely dangerous. Please do not attempt this yourself.
I called my helper u2014 the guy I rely on when things get dicey, a dependable if unenthusiastic character. Not exactly brimming with enthusiasm this time either, but I loaded the truck with pipe and fittings and headed to the apartment, planning to meet him there.
He wasn’t there when I arrived. So I started building the scaffold on my own.
Tools and materials: tankan pipe, swivel clamps, fixed clamps, impact driver, scaffolding spanner.
I balanced the pipes against the truck bed and connected them carefully. Then, early in the process, I lost my balance u2014 a vertical column started toppling toward me. Heart-stopping moment.
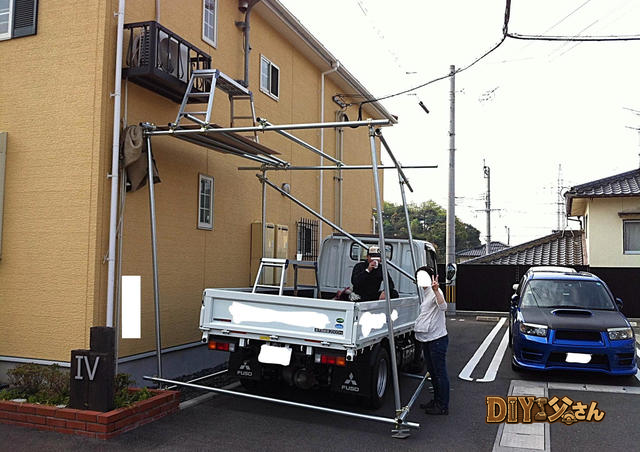
Eventually four columns were standing and connected with horizontal beams. My helper showed up around this point u2014 he did come after all. We added diagonal bracing to stabilize the structure, then laid a plywood sheet across the top. Simple but functional high-work platform u2014 complete.
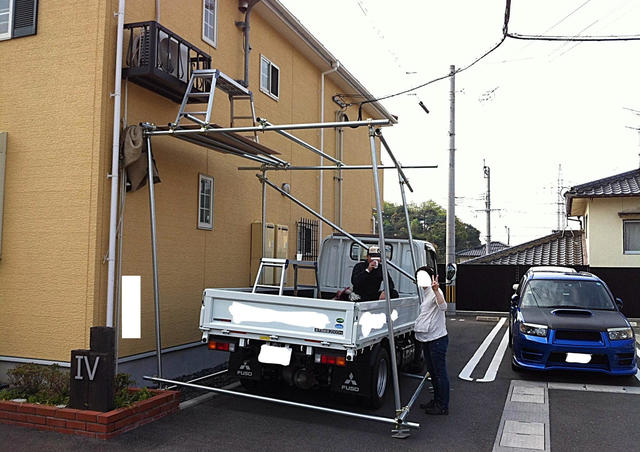
The temporary scaffold.
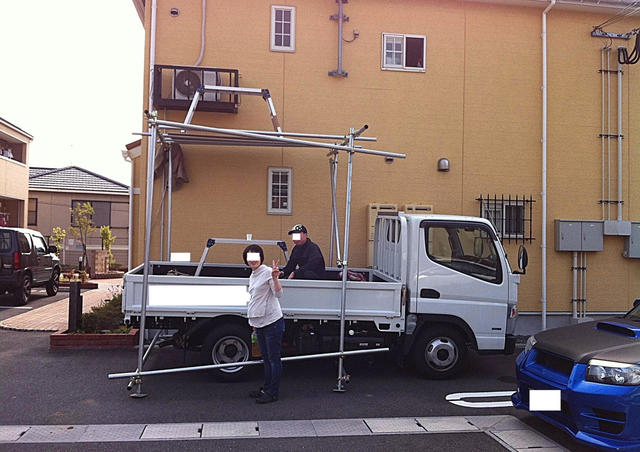
Another angle. A solid 2+ meters up u2014 full high-work territory.
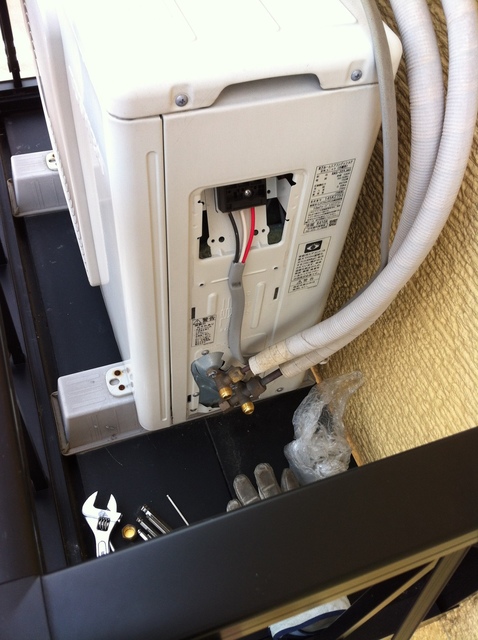
Disconnecting the outdoor unit wiring u2014 working in a precarious position at height.
Safely removed the air conditioner sets and hauled them back to the new house. Racing against the rental clock at this point.
DIY Dad had learned the installation procedure from the internet u2014 but knowing the steps and having done them are two different things. Unexpected situations came up. But cost reduction was the goal, and the reckless challenge continued.
Here’s hoping I don’t wreck the air conditioners in the rush u2014 that would rather defeat the purpose. That’s it for today u2014 see you next time!
ud83dudcda Living Room Renovation Series u2014 18 of 20
u2190 Living Room Renovation Vol.17: Ceiling Fan Installation u00b7 Series Index u00b7 Living Room Renovation Vol.19: Air Conditioner Install Pt.2 u2192
DIY Renovation Quote Review Manual
How to read, compare, and negotiate contractor quotes. This manual saved me u00a5800,000 on a single renovation project.
ud83cudfe0 More from DIY Father
15 years of landlord experience u00b7 3 apartment buildings u00b7 DIY renovations that saved millions of yen. Browse all articles at diytosan.com