ud83dudcda Kitchen 2 Renovation Series u2014 28 of 45
u2190 Kitchen2 Vol.27: Dishwasher Install Vol.5 u00b7 Series Index u00b7 Kitchen2 Vol.29: Dishwasher Install Vol.7 u2192
-> Back to all English articles
First published: 2017-02-13 / Updated: May 2026
2026 Note from DIY Dad: Built-in Dishwasher u2014 Detailed Installation
ud83duded2 RECOMMENDED PRODUCTS
Modern Kitchen Cabinet Handles
New handles cost u00a53,000u20138,000 and make a kitchen feel 10 years newer instantly.
Installing a built-in dishwasher is a major job covering water supply, drainage, power supply, and cabinet opening work. DIY Dad tackled it across multiple sessions.
Water Supply, Drain, Leveling, Front Panel, Test Run
ud83duded2 RECOMMENDED PRODUCTS
Kitchen Faucets
A faucet upgrade is the single highest-impact kitchen DIY per yen spent.
Key points: branch the water supply from the stop valve under the sink; route the drain hose high to prevent back-flow; level with adjusters; fit the front panel to match the existing cabinetry; always start with an empty test cycle. (See Vol.29 for full detail on each step.) m(_ _)m
Hi, it’s DIY Dad! Yesterday I wrote that I wasn’t sure whether to post about this u2014 but something happened, so here it is. Project K3A u2014 paperwork related to a contract arrived from the partner company. It was evening, so DIY Dad was already a bit tipsy. Looking over the documents with a foggy head… several odd clauses jumped out. “[Blank] overage”, “[Blank] regulation”, “asbestos”, “special clause”, “penalty fee”… Even half-drunk, those words get your attention.
I had planned to dive into Project K3A next week, but it looks like I can’t afford to relax. Continuing the 1F kitchen renovation!
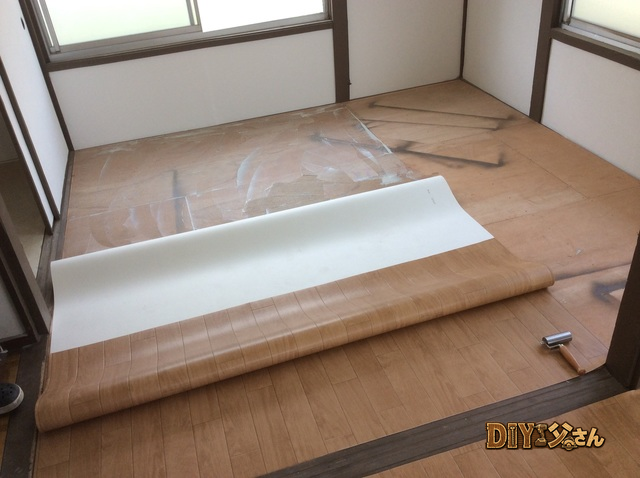
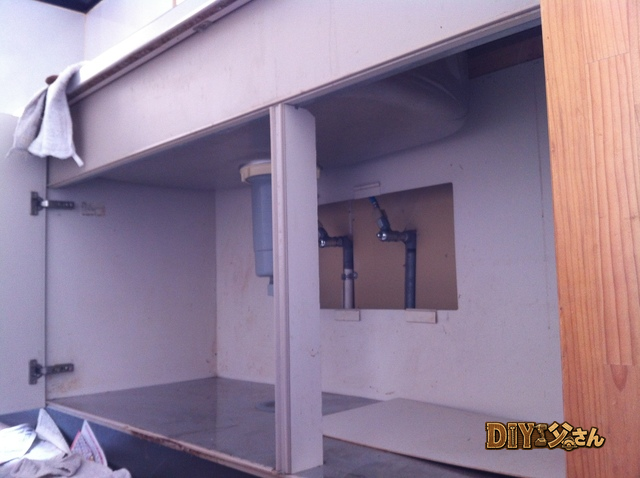
DIY Dad modifies the kitchen to gain the needed depth. This kitchen faces a counter on the other side u2014 a counter-style open kitchen. That means behind the kitchen rear wall there should be the counter-side wall. Let’s take a look.
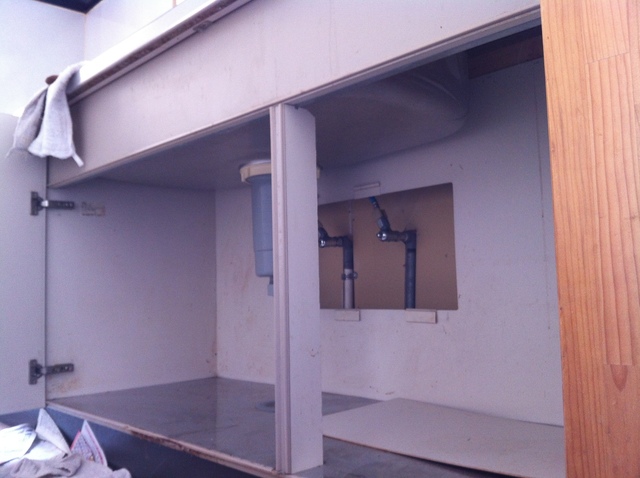
Inside the kitchen cabinet.
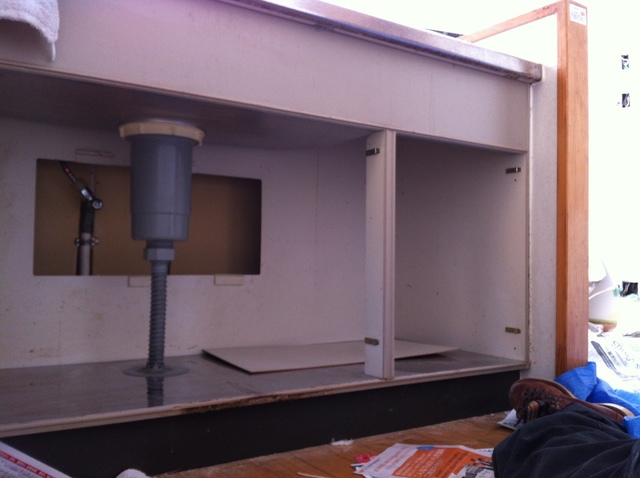
Inside the kitchen cabinet. Beyond the rear wall we can see the water pipes. That cavity measures 120 mm.
DIY Dad decides to break through the rear kitchen wall! This gains 120 mm of depth, bringing the total to 620 mm u2014 enough to consider a slide-open (top-loading) style dishwasher, which lets you load dishes from above.
Slide-Open Type u2014 Pros and Cons
- Pros: Easy loading from above; gel-type detergent compatible; often features latest tech; can place storage below; more water-efficient than front-open type
- Cons: Smaller interior volume; requires technique to load dishes from below the rack
That’s all for today!
ud83dudcda Kitchen 2 Renovation Series u2014 28 of 45
u2190 Kitchen2 Vol.27: Dishwasher Install Vol.5 u00b7 Series Index u00b7 Kitchen2 Vol.29: Dishwasher Install Vol.7 u2192
DIY Renovation Quote Review Manual
How to read, compare, and negotiate contractor quotes. This manual saved me u00a5800,000 on a single renovation project.
ud83cudfe0 More from DIY Father
15 years of landlord experience u00b7 3 apartment buildings u00b7 DIY renovations that saved millions of yen. Browse all articles at diytosan.com