ud83dudcda Kitchen 2 Renovation Series u2014 29 of 45
u2190 Kitchen2 Vol.28: Dishwasher Install Vol.6 u00b7 Series Index u00b7 Kitchen2 Vol.30: Dishwasher Install Vol.8 u2192
-> Back to all English articles
First published: 2017-02-15 / Updated: May 2026
2026 Note from DIY Dad: Built-in Dishwasher u2014 Detailed Installation
ud83duded2 RECOMMENDED PRODUCTS
Modern Kitchen Cabinet Handles
New handles cost u00a53,000u20138,000 and make a kitchen feel 10 years newer instantly.
Installing a built-in dishwasher is a major job that touches water supply, drainage, power, and cabinet opening work all at once. DIY Dad tackled it across multiple sessions.
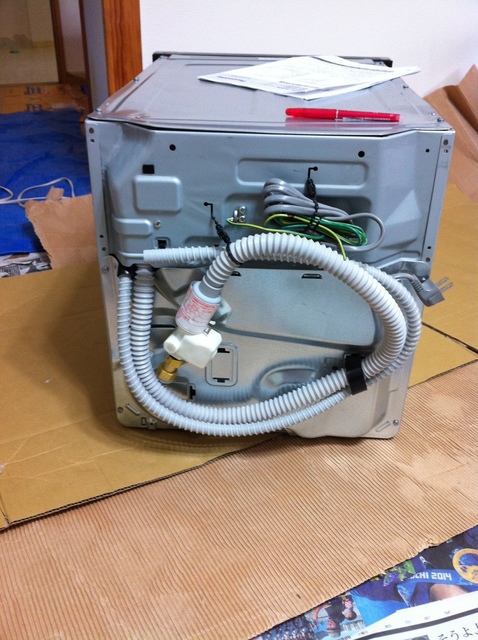
Connecting the Water Supply Hose
ud83duded2 RECOMMENDED PRODUCTS
Kitchen Faucets
A faucet upgrade is the single highest-impact kitchen DIY per yen spent.
The typical approach is to branch off from the stop valve under the sink. Fit a branch connector (for angled stop valves) and connect the dishwasher’s supplied water supply hose.
Key Connection Points
- Confirm the stop valve size (13 mm or 20 mm) in advance
- Using a manufacturer-genuine branch connector is the safest choice
- After connecting, always run water and check for leaks
- Route the hose without any kinks
Of course you close the stop valve before working u2014 but DIY Dad also always closes the main valve (at the water meter) as a second safety measure. m(_ _)m
Connecting the Drain Hose
Connect the dishwasher drain to the sink’s drain trap. If the trap has a dishwasher branch port, use it; otherwise swap in a dishwasher-compatible drain trap.
Route the drain hose high first and then bring it down u2014 this is the basic anti-siphon measure. If the hose runs lower than the dishwasher’s drain outlet, wastewater can back-flow.
Leveling the Dishwasher
ud83duded2 RECOMMENDED PRODUCTS
Kitchen Backsplash Tile Kits
A tiled backsplash protects the wall and dramatically upgrades the kitchen appearance.
Getting the unit perfectly level is critical. An unlevel dishwasher causes:
- Heavy or too-light door operation
- Uneven water distribution and poor cleaning
- Excess vibration and noise
Use the leg adjusters to level front-to-back and side-to-side. A bubble level is the right tool for the job. m(_ _)m
Fitting the Front Panel
Built-in dishwashers require a front panel (decorative face plate) to blend with the cabinetry. DIY Dad sourced panel material matching the existing cabinet color and texture, cut it to fit, and attached it to the dishwasher door. The cohesive look is very satisfying.
Test Run and Final Check
- Check for water supply and drain leaks (open door and inspect inside too)
- Confirm all wash programs run normally
- Confirm door opens and closes smoothly
- Check for excessive noise or vibration
- Confirm drain flows freely (check under sink after cycle)
Always start with an empty cycle. If that passes, run a loaded cycle. Once both check out u2014 installation complete! m(_ _)m
Hi, it’s DIY Dad! Multiple plans are colliding and I’m swamped with coordination work. No guarantee anything goes smoothly. If things fall apart, all of it will be wasted. Honestly a little tired, but incredibly fired up u2014 life is overfull in the best way! DIY Dad won’t give up! Continuing the 1F kitchen renovation!
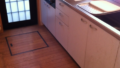
It looks like we can carve out the space for the dishwasher u2014 though the dimensions are extremely tight. Let’s check the Panasonic dishwasher specs against our measurements.
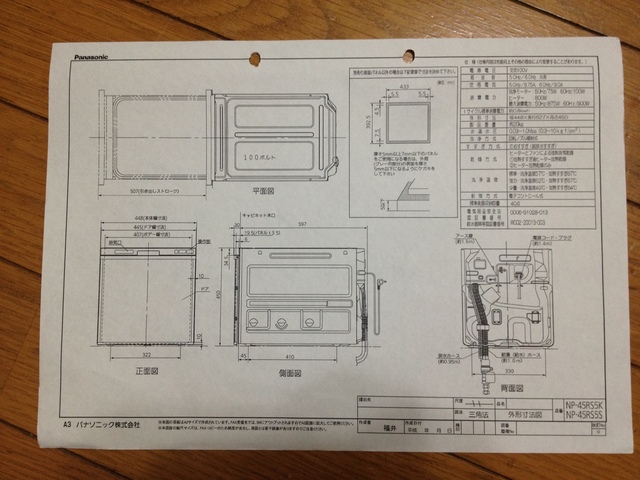
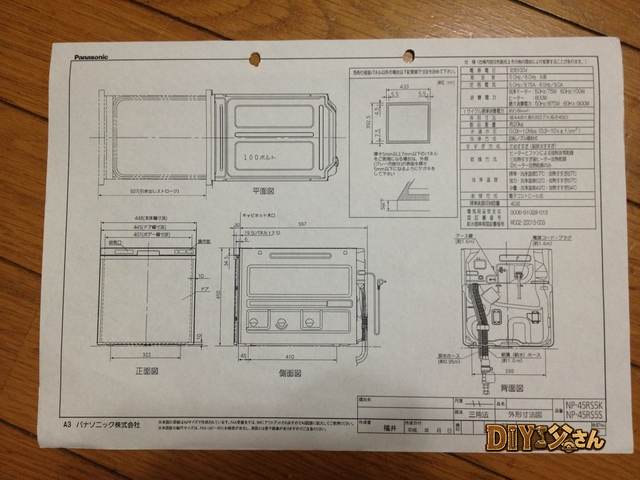
Panasonic dishwasher spec drawing.
Cabinet edge to unit rear: 597 mm. Cabinet edge to front panel: 30 mm. Total depth: 627 mm. Kitchen depth: 620 mm < unit total depth: 627 mm. Overshoot!
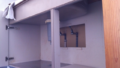
…Wait. Thinking calmly u2014 the unit just needs to fit inside the kitchen up to the cabinet edge. The space behind the dishwasher after installation: 620 mm u2212 597 mm = 23 mm. That’s 23 mm. Enough to route the supply and drain hoses? It feels like it might be below the minimum. But let’s try and see. DIY Dad goes for it!
Model decided: Panasonic NP-45RS5SAA.
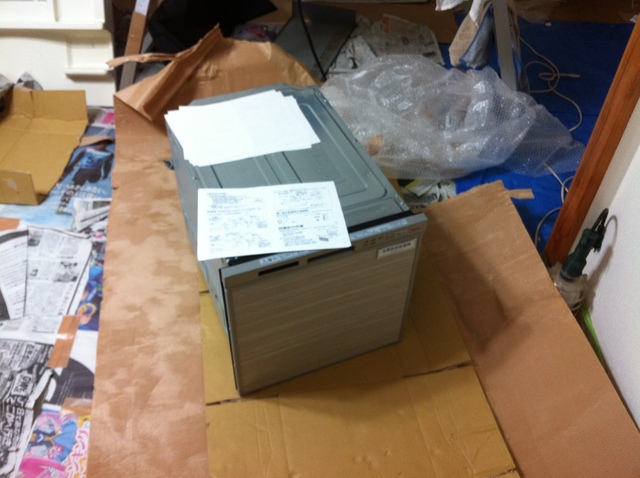
This is our built-in dishwasher.
This is our built-in dishwasher. For pricing and specs, see the DIY Dad Equipment Guide u2014 Kitchen Edition. That’s all for today!
ud83dudcda Kitchen 2 Renovation Series u2014 29 of 45
u2190 Kitchen2 Vol.28: Dishwasher Install Vol.6 u00b7 Series Index u00b7 Kitchen2 Vol.30: Dishwasher Install Vol.8 u2192
DIY Renovation Quote Review Manual
How to read, compare, and negotiate contractor quotes. This manual saved me u00a5800,000 on a single renovation project.
ud83cudfe0 More from DIY Father
15 years of landlord experience u00b7 3 apartment buildings u00b7 DIY renovations that saved millions of yen. Browse all articles at diytosan.com