ud83dudcda Kitchen 2 Renovation Series u2014 44 of 45
u2190 Kitchen2 Vol.43: Sink Light Install u00b7 Series Index u00b7 Kitchen2 Vol.45: Renovation Complete! u2192
2026 Update from DIY Dad: Final Kitchen Accessories and Property Summary
ud83duded2 RECOMMENDED PRODUCTS
Modern Kitchen Cabinet Handles
New handles cost u00a53,000u20138,000 and make a kitchen feel 10 years newer instantly.
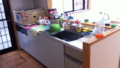
After the dishwasher, IH cooktop, and sink light, we attach the remaining accessories. The property’s renovation is winding down and it’s almost time to move in.
Final Kitchen Accessories
ud83duded2 RECOMMENDED PRODUCTS
Kitchen Faucets
A faucet upgrade is the single highest-impact kitchen DIY per yen spent.
- Towel bar
- Wall-mounted dish rack
- Outlet plate (if replaced)
- Switch plate
Just swapping these small items dramatically freshens up the kitchen. Outlet and switch plates are only a few hundred yen each u2014 best ROI renovation you can do.
Why DIY Dad Moves Into His Own Renovated Properties
- Living there reveals issues that prompt further improvements
- Gain tenant-eye perspective on problems
- Plan the next renovation while living there
- The motivation of “creating a place I’d want to live in”
A property you’d want to live in yourself is one that tenants will choose.
Hi, it’s DIY Dad.
Project K3A u2014 contract complete. Next: the contractor contract. Hoping the timing works out u2014 though I haven’t even reached out to set up an appointment yet.
Continuing the 1F kitchen renovation.
Installing accessories: switch/outlet panels, lighting, and the bathroom dryer operation panel.
Tools and materials used: switch panel, outlet panel, impact driver, screwdriver.
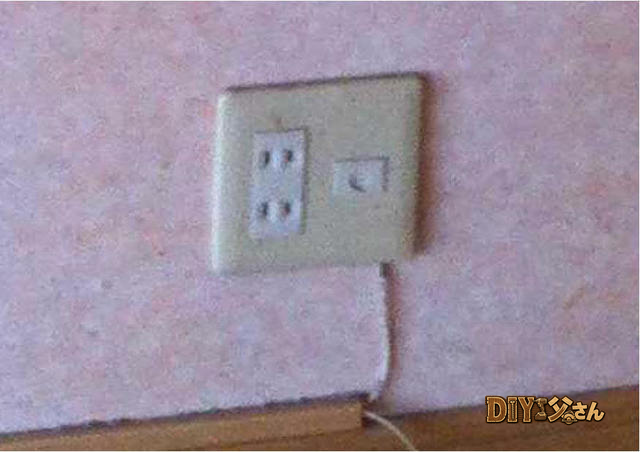
Let’s look at the outlet panel before and after.

u2191 Outlet panel before replacement.
We mask the wiring and hide it inside the wall, then replace the wallpaper.
u2191 After wallpaper replacement.
Score the wallpaper in an X shape with a cutter knife.

u2191 X cut.
Fold back the wallpaper flaps.
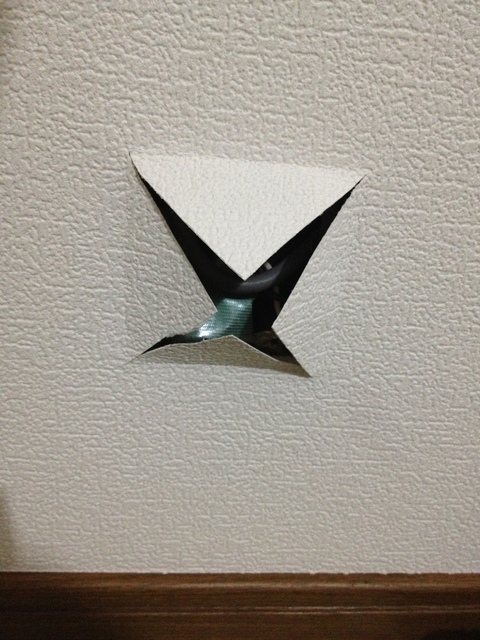
u2191 Folding back the wallpaper.
Cut and remove the wallpaper pieces to expose the wiring.
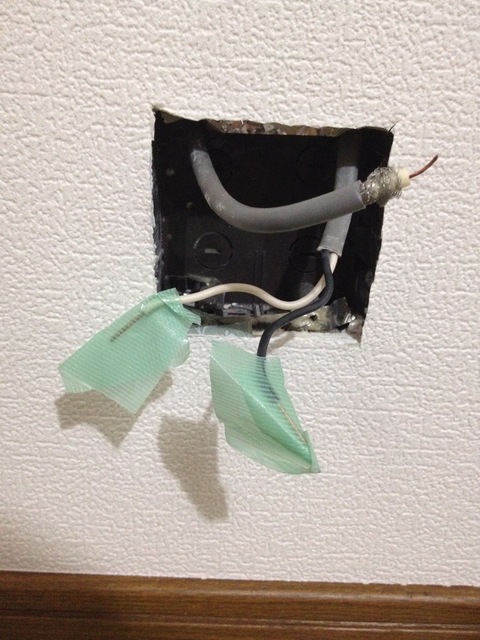
u2191 Wiring exposed.
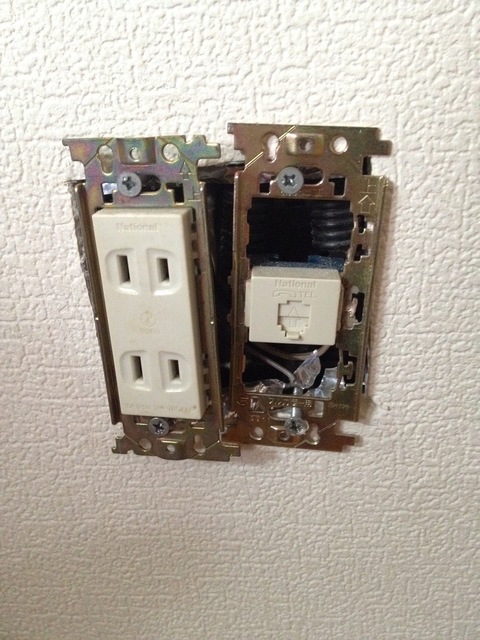
Attach the outlet panel and connect the wiring.
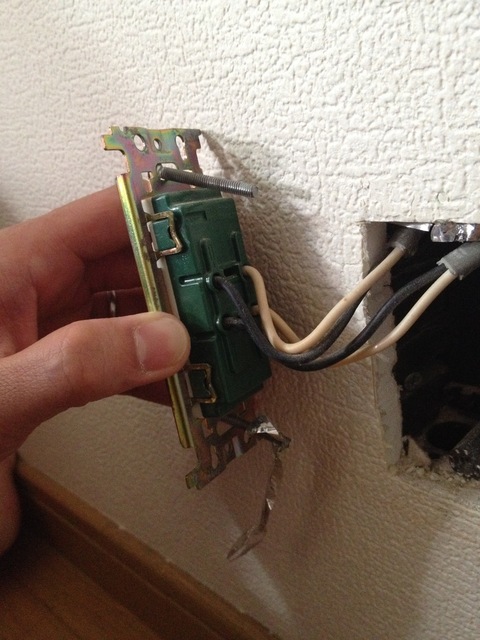
u2191 Wiring connected.
Secure the outlet base with two screws (top and bottom).
u2191 Outlet base.
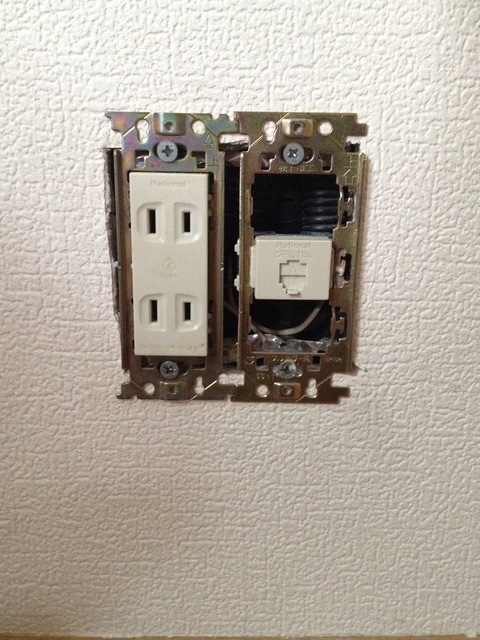
u2191 Outlet base.
Secure the decorative panel base u2014 also with two screws (top and bottom).
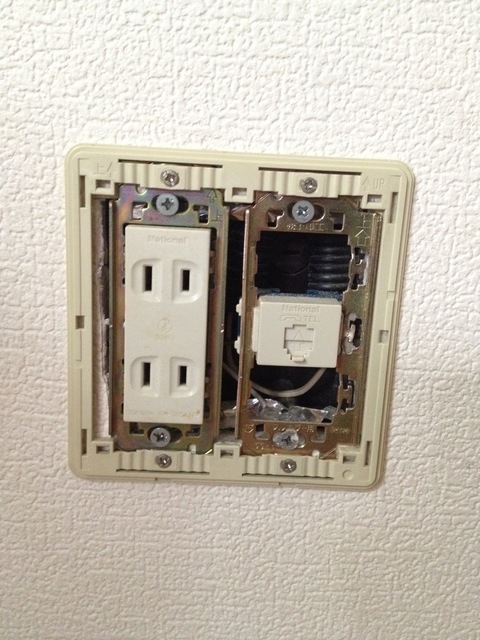
u2191 Decorative panel base.
Snap on the decorative panel u2014 it clicks into place. Installation complete!
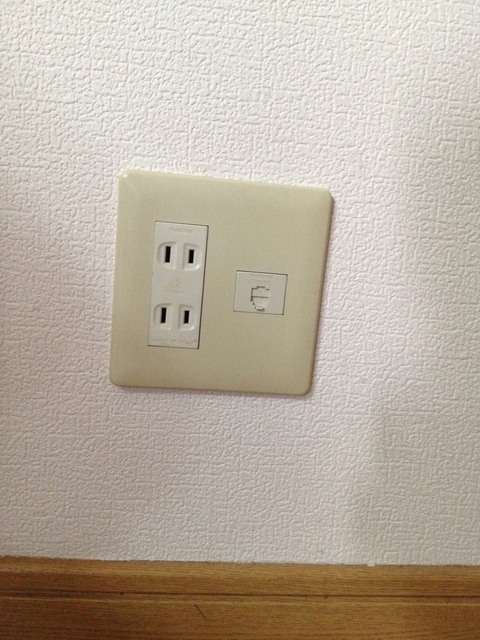
u2191 Outlet panel after replacement.
That’s it for today u2014 see you next time!
ud83dudcda Kitchen 2 Renovation Series u2014 44 of 45
u2190 Kitchen2 Vol.43: Sink Light Install u00b7 Series Index u00b7 Kitchen2 Vol.45: Renovation Complete! u2192
DIY Renovation Quote Review Manual
How to read, compare, and negotiate contractor quotes. This manual saved me u00a5800,000 on a single renovation project.
ud83cudfe0 More from DIY Father
15 years of landlord experience u00b7 3 apartment buildings u00b7 DIY renovations that saved millions of yen. Browse all articles at diytosan.com