ud83dudcda Living Room Renovation Series u2014 8 of 20
u2190 Living Room Renovation Vol.7: Roof Leak Repair u00b7 Series Index u00b7 Living Room Renovation Vol.9: Ceiling Reinforcement Pt.2 u2192
u270fufe0f Originally published: November 14, 2016 / ud83dudd04 Updated: May 7, 2026
- Hello u2014 It’s DIY Dad! ud83dudc4b
- 2026 Note from DIY Dad: The Big Picture of the Living Room Renovation
- Start by Removing Everything on the Walls
- Floor Protection: More Is Better
- Tips for Stripping Old Wallpaper
- Wall Substrate Prep (Patching) u2014 the Foundation of a Clean Finish
- ud83cudfe0 Lumber & Wall Materials by Mail Order
- ud83dudca1 Not Sure About DIY? Comparing Contractors?
Hello u2014 It’s DIY Dad! ud83dudc4b
ud83duded2 RECOMMENDED PRODUCTS
Cordless Drill & Driver Kit
The single most-used tool across 15 years of rental property repairs.
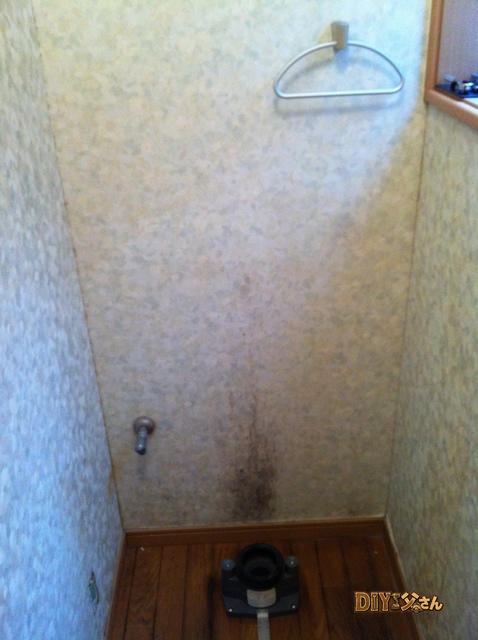
This is a continuation of the 1F living room renovation series. Because I’m planning to install a ceiling fan light, the next step is reinforcing the ceiling. Tools and materials used: MDF board, joint compound, a jigsaw, an impact driver, a disc grinder, and a utility knife.
The process is similar to the leak repair work u2014 the difference is that I’m replacing gypsum board with a reinforcement panel instead of a repair patch. Ceiling fan lights are quite heavy, and getting hit by a falling one would really hurt. The installation manual also explicitly states that mounting to a gypsum board ceiling is not allowed. To handle the weight properly, I need to replace a section of gypsum board with structural plywood.
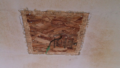
First, cut an opening in the gypsum board the size of the reinforcement area.
u2191 A clean hole appears in the ceiling!
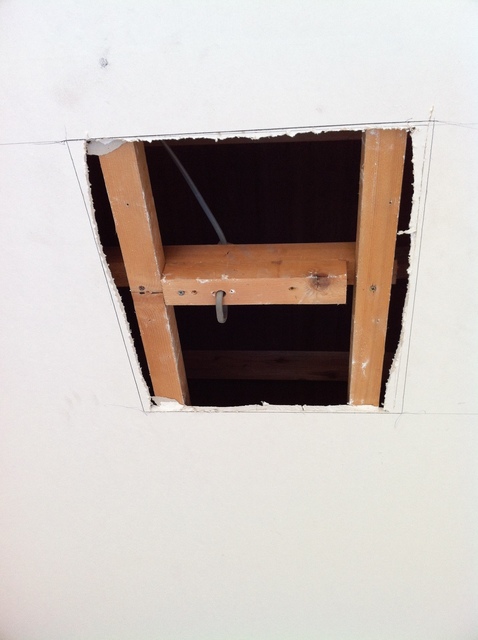
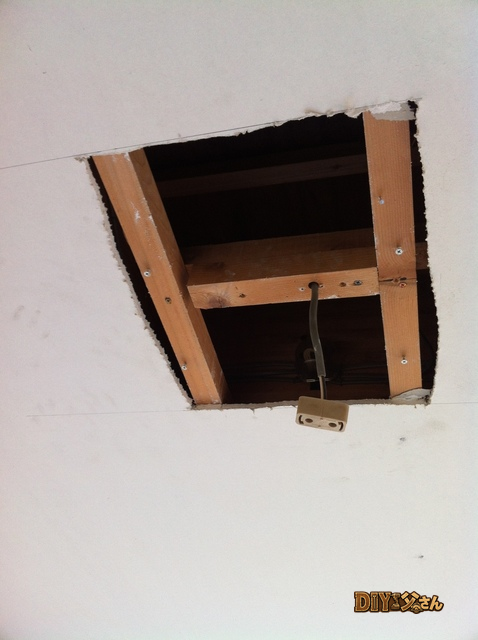
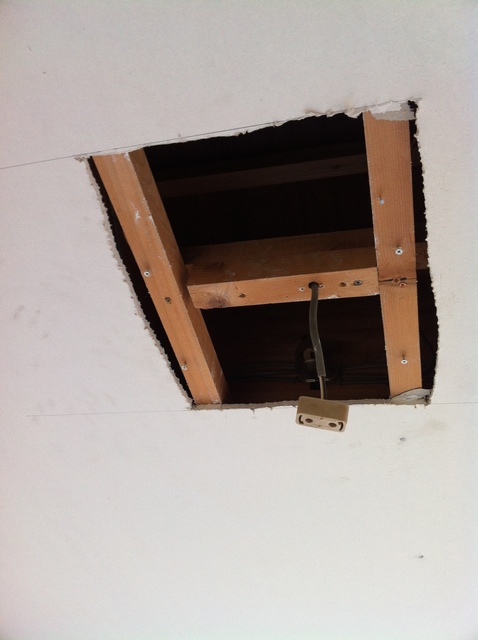
u2191 Tidying up the edges.
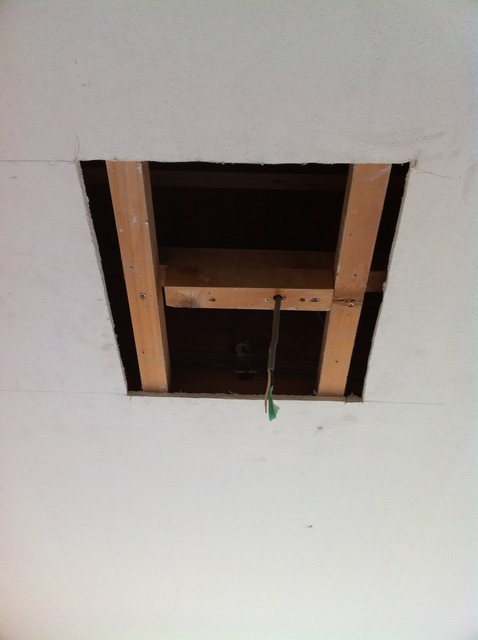
u2191 Clean edges u2014 ready for the reinforcement panel. That’s all for today u2014 see you next time! ud83dudc4b
2026 Note from DIY Dad: The Big Picture of the Living Room Renovation
ud83duded2 RECOMMENDED PRODUCTS
Complete Home Repair Tool Set
A complete kit beats buying individual tools every time u2014 cheaper and always ready.
The living room was the most work-intensive phase of the entire renovation series. From stripping the old wallpaper to substrate prep, leak repairs, and ceiling reinforcement u2014 there were honestly moments when I thought “how much more is there to do?” ud83dude05
Start by Removing Everything on the Walls
The first thing to do in any wallpaper renovation is to remove everything attached to the walls: switch and outlet plates, light fixtures, curtain rods. If you try to replace wallpaper without removing these, the finish will always look sloppy.
A common beginner mistake is leaving switch plates on and trying to work around them u2014 the result is wallpaper that lifts or tears at the edges. As a mechanical engineer, I think of this as “complete the prior step before starting the main step” u2014 a basic process principle. ud83dudcaa
Removing Outlet Plates u2014 Safety First
Turn the breaker off before touching anything u2014 that’s non-negotiable. The plates themselves just need a screwdriver. Don’t touch the wires. Older buildings may also have a grounding wire (green or green-yellow) u2014 loosen the screw and it comes right off.
Intercoms are a bit more involved, since their wiring runs inside the wall. If you plan to use the existing wiring for a new unit, photograph which wire connects where before disconnecting anything. DIY Dad photographs every connection with his phone every single time.
Floor Protection: More Is Better
ud83duded2 RECOMMENDED PRODUCTS
Adhesives & Sealants
Keep a stock of these u2014 you’ll use them on every single repair job.
If you scratch the floor during wallpaper work, the repair is painful. Lay masking film (corona masker tape) across the entire floor and secure every edge u2014 no gaps. That way, even if compound or paste drips, it peels right up.
“It’s just protection” u2014 cut corners here, and you’ll spend an hour chipping dried compound off the floor. Especially on your first job: over-protect, every time.
Tips for Stripping Old Wallpaper
Work a putty knife parallel to the wall surface and peel gradually. Forcing it causes the gypsum board facing to tear away with the wallpaper u2014 be careful. If the paper is stubborn, dampen it lightly with a sponge or spray bottle. Too much water and the gypsum board absorbs it and weakens, so use a light touch.
One thing DIY Dad noticed: older wallpaper tends to separate more easily, while newer wallpaper is often bonded more firmly.
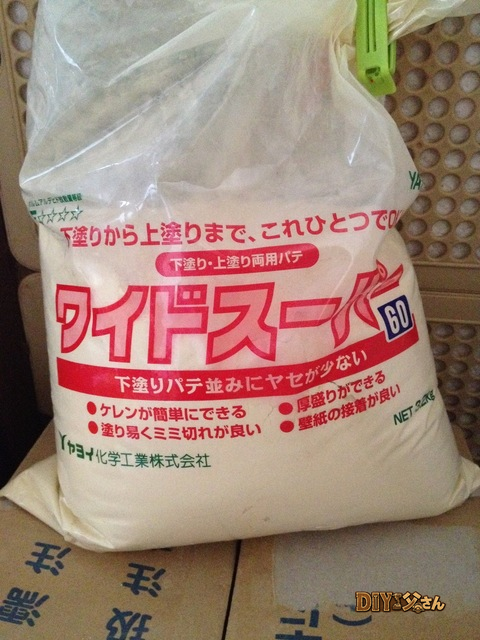
Wall Substrate Prep (Patching) u2014 the Foundation of a Clean Finish
After stripping old wallpaper, the wall surface has screw holes and ridges at old seams. Fill them with joint compound and sand to a smooth, flat surface before hanging the new wallpaper.
Skip the patching and the imperfections will show right through the new paper. “I replaced it but it still looks rough” u2014 nine times out of ten, that’s down to poor substrate prep.
Mesh tape is ideal for repairing actual holes: apply it overlapping the edges of the hole, skim compound over it, let it dry, then sand flat.
ud83cudfe0 Lumber & Wall Materials by Mail Order
The lumber and board materials I used for this project u2014 ordering online often gets you better quality than what’s available at the local home center. DIY Dad’s verdict, for what it’s worth. ud83dude04
- Marutoku Shop u2014 order lumber by the piece u00bb
- 5-Line Laser Level (essential for wall work) u00bb
ud83dudca1 Not Sure About DIY? Comparing Contractors?
There’s a line between what’s realistic to DIY and what’s best left to a professional. Getting free quotes from multiple contractors before you decide is the smartest way to avoid regret.
- Browse Takara Standard’s showroom u00bb
ud83dudcda Living Room Renovation Series u2014 8 of 20
u2190 Living Room Renovation Vol.7: Roof Leak Repair u00b7 Series Index u00b7 Living Room Renovation Vol.9: Ceiling Reinforcement Pt.2 u2192
DIY Renovation Quote Review Manual
How to read, compare, and negotiate contractor quotes. This manual saved me u00a5800,000 on a single renovation project.
ud83cudfe0 More from DIY Father
15 years of landlord experience u00b7 3 apartment buildings u00b7 DIY renovations that saved millions of yen. Browse all articles at diytosan.com