ud83dudcda Bathroom Renovation Series u2014 21 of 25
u2190 Bathroom Renovation Vol.20: Vanity Installation Pt.1 u00b7 Series Index u00b7 Bathroom Renovation Vol.22: Light Switch Installation u2192
u270fufe0f Originally published: 2016-12-13 / ud83dudd04 Rewritten: May 8, 2026
- u270fufe0f 2026 Update from DIY Dad: Finishing Touches on the Bathroom/Laundry Room
- Wallpaper Tips for Wet Areas
- Vanity Installation Steps
- Restoring the Dryer Panel Wiring
- Finishing with the Washing Machine and Storage Shelf
- Landlord’s Perspective: Cost vs. Return
- ud83dudebf For Anyone Considering a Vanity or Wet Area Renovation
u270fufe0f 2026 Update from DIY Dad: Finishing Touches on the Bathroom/Laundry Room
ud83duded2 RECOMMENDED PRODUCTS
Mold-Resistant Bathroom Caulk
Re-caulk every 3u20135 years. Black mold on caulk is the #1 tenant complaint in Japan.
We’re in the finishing stretch of the bathroom/laundry room renovation u2014 wallpaper up, vanity being installed. This is the phase that demands the most precision.
Wallpaper Tips for Wet Areas
ud83duded2 RECOMMENDED PRODUCTS
Bathroom Vanity & Mirror Cabinets
Mirror cabinets add storage and light u2014 tenants notice immediately.
Unlike the rest of the house, wet areas need mold- and moisture-resistant wallpaper u2014 no exceptions. The bathroom/laundry room is a harsh environment: steam from the bath, water vapor from the washing machine, splashes around the sink.
DIY Dad’s wallpaper selection criteria
- Anti-mold and antibacterial treatment (listed on the label for brand-name products)
- Wipeable surface (vinyl wallpaper is ideal)
- Light color u2014 white to light gray (feels clean and makes the room look larger)
- At least 1.0mm thick (thin wallpaper shows every bump in the substrate)
The small area actually helps with precision, but cutting around the exhaust fan and vanity openings takes extra time and care.
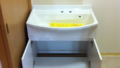
Vanity Installation Steps
The three essentials for vanity installation are: level, connect, caulk.
- Place the unit in position and check for level front-to-back and side-to-side
- Connect the supply lines to the hot and cold shutoff valves (braided flex hose or shower hose)
- Connect the drain trap (S-trap or P-trap)
- Screw the unit to the wall
- Apply caulk (waterproof sealant) along the gap between the vanity and wall
- Run water and check for leaks
The most common problem is a drain trap mismatch u2014 if the existing drain is floor-type and the new vanity is wall-type (or vice versa), you’ll need an adapter. Check this before purchasing and you’ll save yourself a headache.
Restoring the Dryer Panel Wiring
ud83duded2 RECOMMENDED PRODUCTS
Grout Cleaners & Tile Restoration
Clean grout transforms a dated bathroom without any demolition.
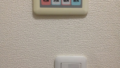
Restore switch and outlet plates only after the wallpaper has dried completely. For the bathroom dryer panel, use pre-work photos as a reference and reconnect wires one by one. DIY Dad had labeled every wire with tape beforehand, so the restoration went smoothly.
Finishing with the Washing Machine and Storage Shelf
The washing machine connects via drain hose to the drain pan drain, with an earth connection to the outlet. The storage shelf should be screwed into wall studs or solid plywood backing u2014 not just drywall. A stud finder makes this easy. For any shelf that will hold weight, stud-anchoring is non-negotiable.
Landlord’s Perspective: Cost vs. Return
Total materials cost for this bathroom/laundry room renovation: approximately 250,000 yen. A contractor doing the same work would charge 800,000 to 1,200,000 yen. DIY saved roughly 550,000 to 950,000 yen.
It takes time, but you come away with a deeper understanding of the property and sharpen your skills for the next tenant turnover. DIY Dad considers it an investment.
ud83dudebf For Anyone Considering a Vanity or Wet Area Renovation
DIY vanity replacement is doable u2014 but get the pipe types and dimensions confirmed before you start. DIY Dad learned the hard way: wrong drain shape, mid-job panic. Don’t let that be you.
![]()
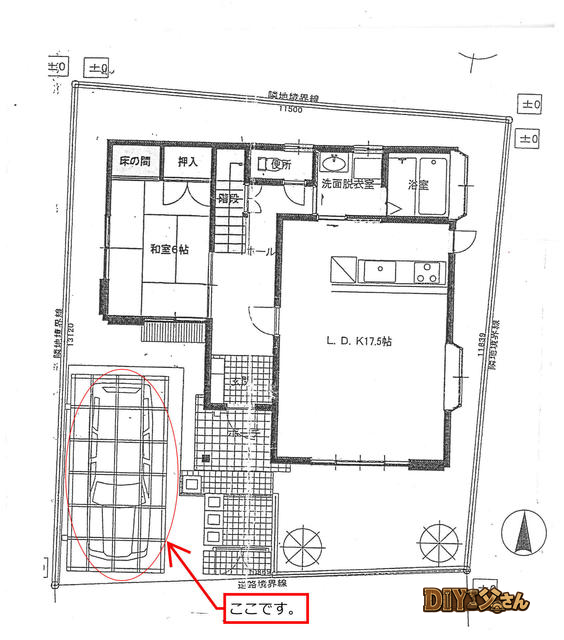
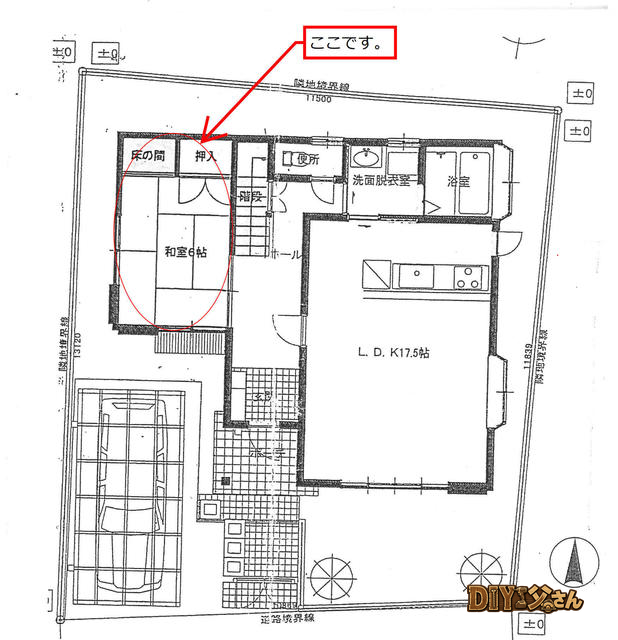
Hi, it’s DIY Dad! Continuing the first-floor bathroom/laundry room renovation u2014 with the vanity in place, it’s time to mount the tri-fold mirror cabinet.
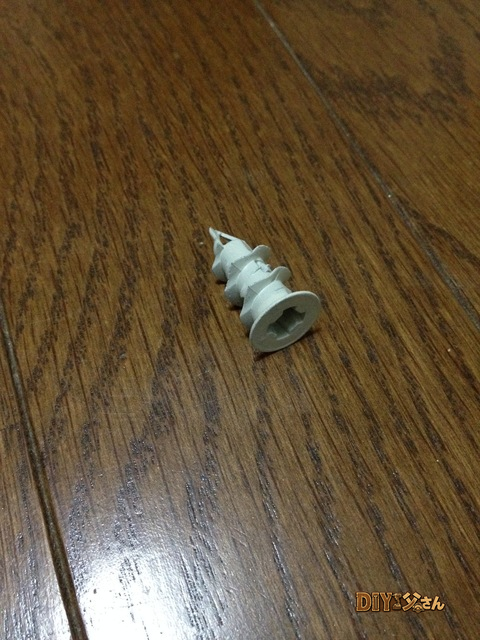
The ideal backing for a mirror cabinet is plywood. Drywall alone isn’t strong enough. In most cases you’ll be dealing with drywall u2014 and that’s the case here too. But no problem u2014 DIY Dad uses drywall anchors.

Drywall anchors u2014 the outer shell has a coarse thread that bites into the drywall as you drive it in, creating a solid threaded hole for a wood screw. Alternatively, you can aim for the wall studs or horizontal blocking.
The vanity is fully installed!
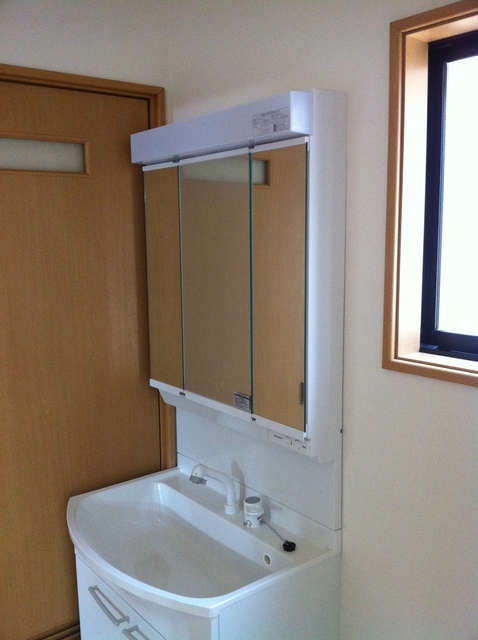
The tri-fold mirror cabinet.
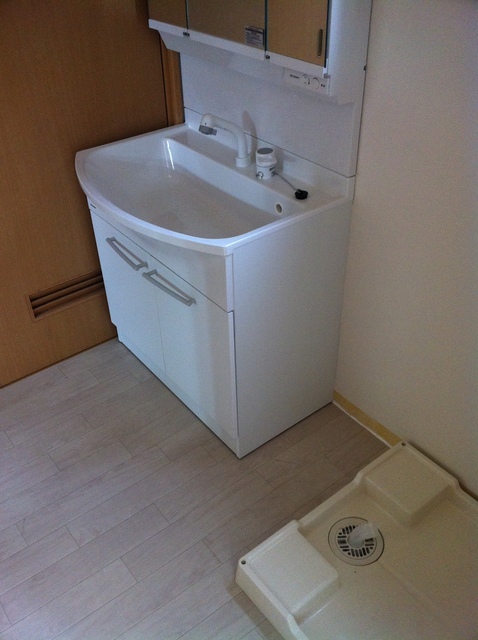
The vanity unit.
This mirror cabinet has storage behind each door panel u2014 but no built-in outlet inside. To solve that, I tap off the lighting outlet at the back of the cabinet. There’s what appears to be a factory knockout plug u2014 I pull it out and route an outlet through that hole from behind.
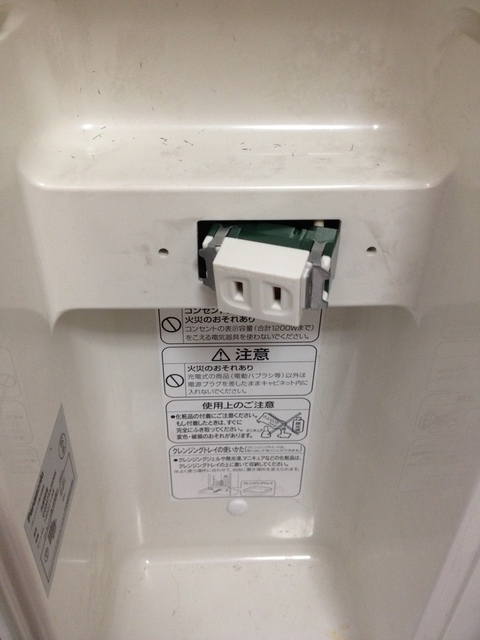
The added outlet u2014 not the prettiest when the doors are open, but you can’t see it with them closed. Now I can charge shavers or electric toothbrushes inside the cabinet without opening the doors. That’s all for today u2014 see you next time!
ud83dudcda Bathroom Renovation Series u2014 21 of 25
u2190 Bathroom Renovation Vol.20: Vanity Installation Pt.1 u00b7 Series Index u00b7 Bathroom Renovation Vol.22: Light Switch Installation u2192
DIY Renovation Quote Review Manual
How to read, compare, and negotiate contractor quotes. This manual saved me u00a5800,000 on a single renovation project.
ud83cudfe0 More from DIY Father
15 years of landlord experience u00b7 3 apartment buildings u00b7 DIY renovations that saved millions of yen. Browse all articles at diytosan.com