ud83dudcda Toilet Renovation Series u2014 20 of 25
u2190 Toilet Renovation Vol.19: Toilet Bowl Installation Pt.3 u00b7 Series Index u00b7 Toilet Renovation Vol.21: Accessories Installation u2192
u270fufe0f Originally published: 2017-01-21 / ud83dudd04 Updated: May 8, 2026
2026 DIY Dad’s Note: Toilet Complete! u2014 Accessories and Final Finish
ud83duded2 RECOMMENDED PRODUCTS
Washlet Toilet Seats (Bidet)
A washlet seat is the single upgrade that impresses every tenant in Japan.
With the toilet bowl set in place, the project moves to the final stage: fitting the accessories. Paper holder, towel ring, and washlet all go on u2014 and the toilet is done. ^ ^
Trial Flush u2014 Checking the Water Level
ud83duded2 RECOMMENDED PRODUCTS
Toilet Repair Kits
Keep a repair kit stocked u2014 toilet calls come without warning at midnight.
Hi, this is DIY Dad. ^ ^ Today was the day of the long-postponed New Year gathering with my childhood friends u2014 looking forward to it so much!
After leaving the toilet to sit for a full day following caulking, it was time for the trial run.
Steps:
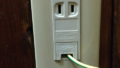
- Remove the masking tape covering the drain opening
- Open the main shut-off valve and let the tank fill
- Pull the flush lever and let the water flow
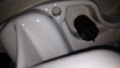
- Check the water level in the bowl after flushing
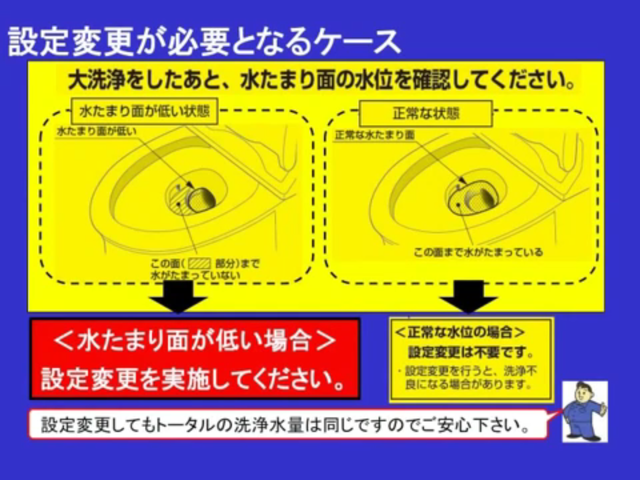
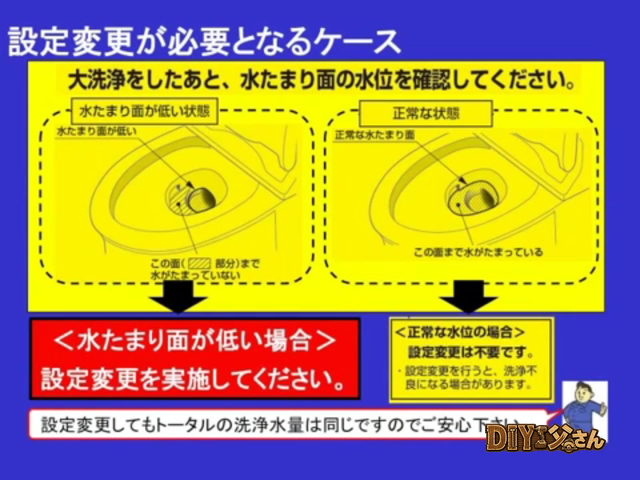
Checking the water level. It must be neither too high nor too low u2014 manufacturers specify an acceptable range. If the level is off, adjustments can be made using the components inside the tank.
Adjustment Procedure
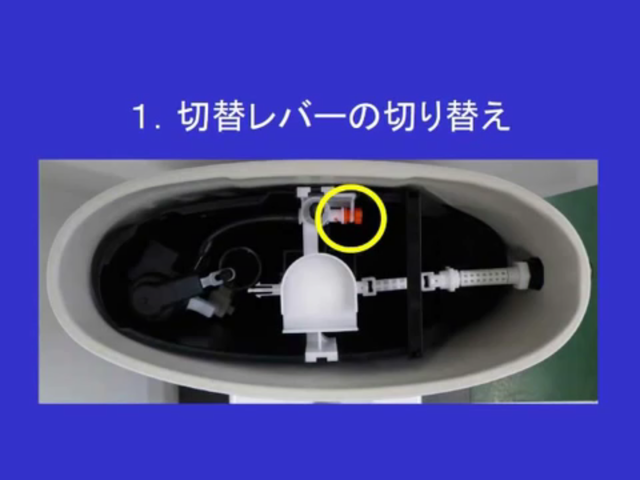
Step 1
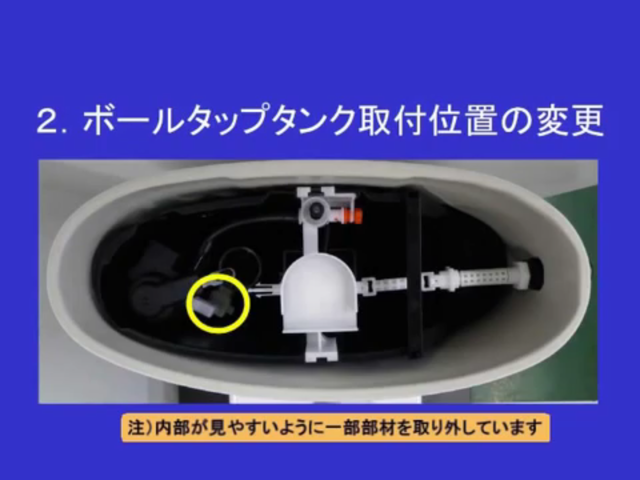
Step 2

Step 3
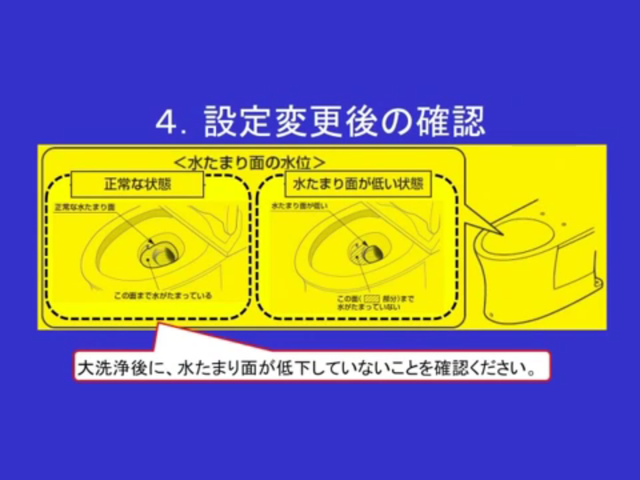
Step 4
Once the water level falls within the specified range, the trial run is complete. The toilet bowl installation series is done!
Key Points for Toilet Bowl Installation
As a reminder, the essentials covered across this series:
- Always replace the wax gasket (never reuse the old one)
- Tighten anchor bolts hand-tight plus a quarter turn u2014 do not overtighten porcelain
- Verify the flange bolt pattern matches your new toilet before purchasing
- Leave the silicone caulk to cure fully before running water through the bowl
ud83dudebd Thinking About a Toilet Renovation?
Even just replacing the toilet bowl makes a dramatic difference to the feel of the room. Upgrading to a modern toilet with a built-in washlet is a change DIY Dad has applied to every property in his portfolio. ^ ^
24-hour emergency plumbing u2014 Water Rescue Squad u00bb
Marutoku Shop | Wainscoting panels and timber u2014 order by the piece u00bb
ud83dudcda Toilet Renovation Series u2014 20 of 25
u2190 Toilet Renovation Vol.19: Toilet Bowl Installation Pt.3 u00b7 Series Index u00b7 Toilet Renovation Vol.21: Accessories Installation u2192
DIY Renovation Quote Review Manual
How to read, compare, and negotiate contractor quotes. This manual saved me u00a5800,000 on a single renovation project.
ud83cudfe0 More from DIY Father
15 years of landlord experience u00b7 3 apartment buildings u00b7 DIY renovations that saved millions of yen. Browse all articles at diytosan.com