ud83dudcda Toilet Renovation Series u2014 9 of 25
u2190 Toilet Renovation Vol.8: Cushion Floor Installation u00b7 Series Index u00b7 Toilet Renovation Vol.10: Wainscot Panel Making Pt.1 u2192
u270fufe0f Originally published: January 10, 2017 / ud83dudd04 Rewritten: May 8, 2026
- u270fufe0f 2026 Update from DIY Dad: Key Points for the Finishing Stage
- Removing Toilet Accessories (Paper Holder, Towel Ring, etc.)
- Floor Repair and Cushion Floor Replacement
- Why I Chose Diatomite for the Toilet Walls
- Diatomite Application Tips (Toilet Edition)
- As a Landlord: Cleanliness u00d7 Functionality Changes Your Occupancy Rate
- ud83dudebd For Anyone Considering a Toilet Renovation
u270fufe0f 2026 Update from DIY Dad: Key Points for the Finishing Stage
ud83duded2 RECOMMENDED PRODUCTS
Washlet Toilet Seats (Bidet)
A washlet seat is the single upgrade that impresses every tenant in Japan.
We’re now at the finishing phase of the toilet renovation. Once all the accessories are removed, it’s time for the floor and wall finish work. Because a toilet is such a small, compact space, the quality of the finish is immediately obvious. ^ ^
Removing Toilet Accessories (Paper Holder, Towel Ring, etc.)
ud83duded2 RECOMMENDED PRODUCTS
Toilet Repair Kits
Keep a repair kit stocked u2014 toilet calls come without warning at midnight.
Before applying wallpaper or diatomite plaster, remove everything attached to the walls.
What to Remove
- Toilet paper holder
- Towel ring / storage shelf
- Outlet cover plate
- Light fixture (if needed)
- Ventilation fan cover
If you try to work around these items, your finish will look sloppy. It’s a rule: no matter how tedious it is, remove everything first. m(_ _)m
Floor Repair and Cushion Floor Replacement
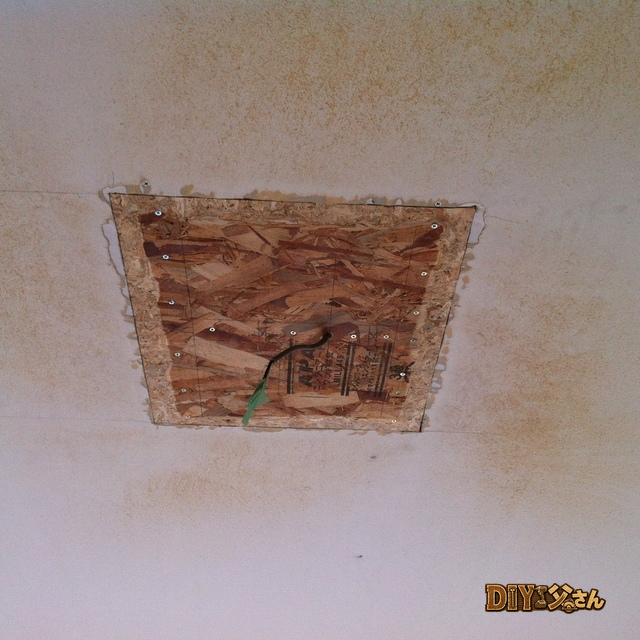
After removing the toilet bowl, you’ll be left with anchor bolt holes in the floor. If the new toilet’s drain flange aligns with the existing holes, you can go straight to laying the new cushion floor (CF) and installing the new toilet.
The hardest part of cutting CF is cutting out the hole for the drain flange. Make a paper template and cut carefully.
DIY Dad’s tip: Make the template for the drain area slightly smaller than the actual opening, then gradually expand it on-site for a better fit without over-cutting. ^ ^
Why I Chose Diatomite for the Toilet Walls
ud83duded2 RECOMMENDED PRODUCTS
Toilet Accessories Sets
Matching accessories cost u00a52,000 and make a small toilet feel designed.
For this toilet renovation I applied diatomite plaster to the walls instead of wallpaper. My reasons for choosing diatomite over wallpaper:
- It absorbs moisture and odors (diatomite’s natural humidity-control and deodorizing properties)
- I’d already used it in the Japanese-style room with great results, so I continued with it
- It creates a more distinctive, premium look than wallpaper
Diatomite does take some practice to apply well, but in a small space like a toilet it’s also a great opportunity to build your technique. DIY Dad’s trowel skills improved considerably working in this tight space. (Lol) u0669( u141b )u0648
Diatomite Application Tips (Toilet Edition)
- Thoroughly mask around the toilet bowl and tank with masking tape
- Protect the water supply pipe and shutoff valve with plastic wrap
- Mask around the ventilation opening and outlet
- Peel off masking tape immediately after applying u2014 before it dries
If you wait until the diatomite dries before peeling the tape, it will tear the surface with it. The rule is: peel the moment you finish applying. m(_ _)m
As a Landlord: Cleanliness u00d7 Functionality Changes Your Occupancy Rate
A toilet with diatomite walls, brand-new cushion flooring, and a fresh washlet-equipped bowl u2014 the reaction from prospective tenants was noticeably different. I heard “Wow, this bathroom is so clean!” again and again. ^ ^
Total material cost for the DIY toilet renovation: around u00a580,000. A contractor would charge u00a5300,000u2013500,000 for the same work. Huge savings through DIY.
ud83dudebd For Anyone Considering a Toilet Renovation
Even just replacing the toilet bowl can dramatically change the feel of the space. Going from a tank-type to a tankless toilet in this property gave the room a completely different sense of spaciousness. ^ ^
Water leaks and clogs get worse if ignored u2014 call a professional right away when trouble strikes.
24-Hour Emergency Plumbing Service u2014 Toilet & Water Trouble u00bb
![]()
Hi there, it’s DIY Dad. ^ ^
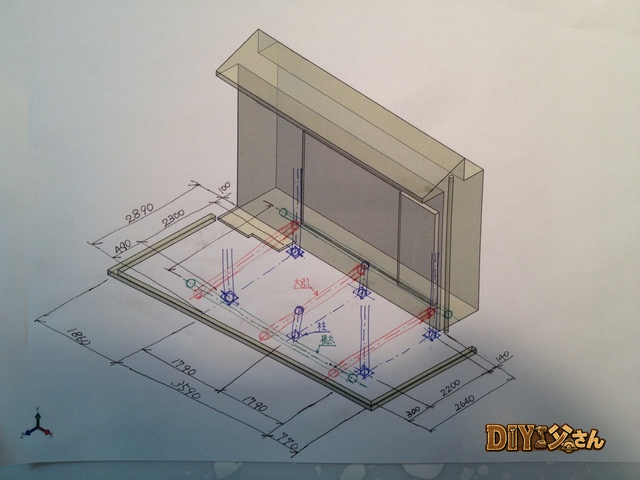
I made the rounds of the home improvement stores for the first time in a while the other day. I was thinking of building a wall-mounted cabinet, so I checked out four different shops. But I couldn’t find quite what I was looking for. Pre-made units are convenient, but they cost a bundle u2014 easily two or three u00a510,000 bills flying out of your wallet. So I considered building one from scratch, but that turned out to be surprisingly expensive too. Faced-finish panels aren’t cheap at the hardware store, which takes away most of the DIY cost advantage. I decided to reconsider my options.
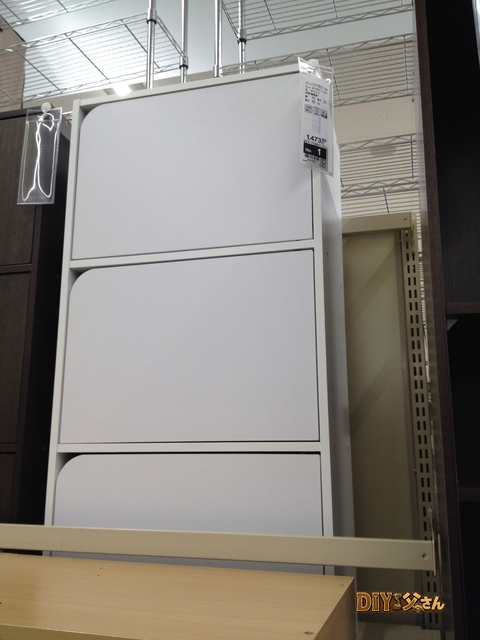
On my way out, I spotted a Nitori home goods store. With mild hope I walked in u2014 and there it was! A ready-made unit that could work perfectly with a little creativity!
u2191 A three-tier rack u2014 with doors! Three-tier racks are already cheap to begin with, so even with doors added the price was surprisingly reasonable. But thinking of it as a wall cabinet? Absurdly cheap. u00a51,580 (tax included). Truly “more than you’d expect u2014 from Nitori!” ^ ^
Continuing on with the 1st-floor toilet renovation. Next up: the wall finish. The plan is to finish the upper half of the walls with diatomite plaster, and the lower half with wood-grain wainscot panels. The vision: a European-style pub toilet. (This is the third time I’ve said that.) (uff3euff2fuff3eu2606u266a
So u2014 applying diatomite plaster right over the existing wallpaper. Tools and materials: diatomite plaster, masking tape, trowel, palette, sponge, putty knife.
First, prep work before applying the diatomite. Apply masking tape about 2 mm away from the application surface. Doing this cleanly has a big impact on the final result. It’s tedious work, but I take my time.
I spread the diatomite with a trowel at a thin, even thickness of about 2 mm. The texture is a trowel finish. I’m working on this at the same time as the Japanese-style room. The materials were just barely enough, so I have to be careful u2014 not too thin, not too thick.
One thing about a toilet: it’s so small that a moment of distraction and your elbow or back brushes against a section you just finished. Focus on your hands and you lose track of the rest of your body. It’s heartbreaking when it happens. (T ^ T)
The edges and corners were also particularly difficult u2014 they came out a bit messy.
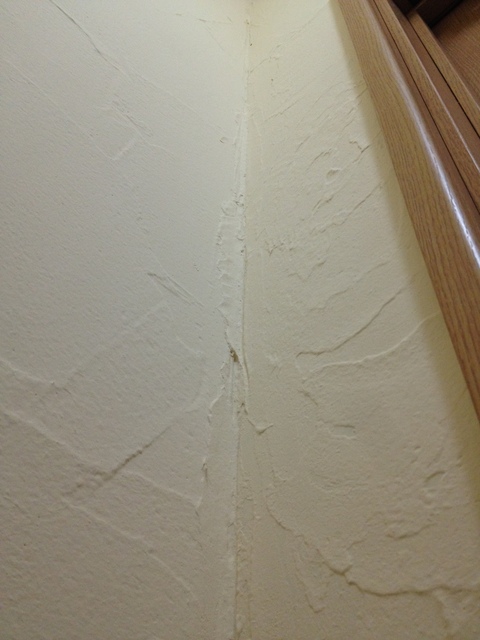
u2191 The corner section. As both the toilet and Japanese-style room neared completion, I had a little diatomite left over, so I applied it a bit thicker in one section of the toilet wall. One way or another, I got it all done. ^^;
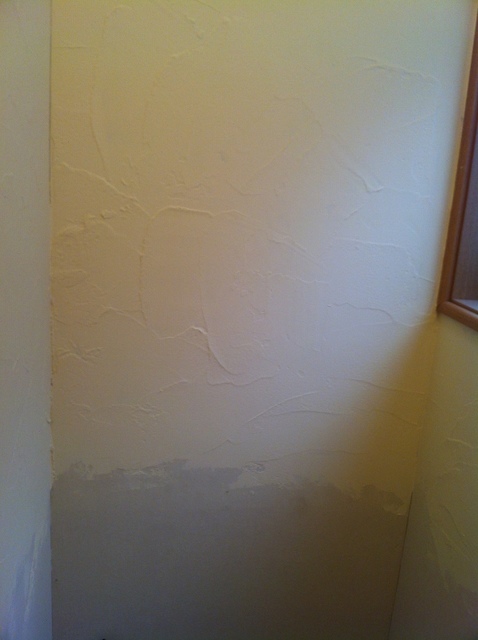
u2191 Diatomite finish.
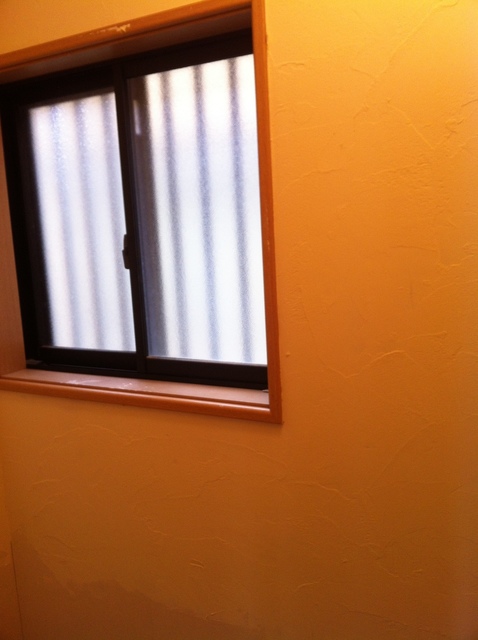
u2191 Diatomite finish. For a first attempt, I think it came out pretty well! DIY Dad recharges on self-satisfaction. uff3c(^o^)uff0f That’s all for today! (^^)/~~~
ud83dudcda Toilet Renovation Series u2014 9 of 25
u2190 Toilet Renovation Vol.8: Cushion Floor Installation u00b7 Series Index u00b7 Toilet Renovation Vol.10: Wainscot Panel Making Pt.1 u2192
DIY Renovation Quote Review Manual
How to read, compare, and negotiate contractor quotes. This manual saved me u00a5800,000 on a single renovation project.
ud83cudfe0 More from DIY Father
15 years of landlord experience u00b7 3 apartment buildings u00b7 DIY renovations that saved millions of yen. Browse all articles at diytosan.com