ud83dudcda Toilet Renovation Series u2014 22 of 25
u2190 Toilet Renovation Vol.21: Accessories Installation u00b7 Series Index u00b7 Toilet Renovation Vol.23: Washlet Installation u2192
u270fufe0f Originally published: 2017-01-26 / ud83dudd04 Updated: May 8, 2026
2026 DIY Dad’s Note: Toilet Complete! u2014 From Accessories to Finish
ud83duded2 RECOMMENDED PRODUCTS
Washlet Toilet Seats (Bidet)
A washlet seat is the single upgrade that impresses every tenant in Japan.
Once the toilet bowl was set in place, it was time for the finishing touches: installing the accessories. With the paper holder, towel ring, and washlet (bidet seat) all in place, the toilet renovation was finally complete. ^ ^
Order of Accessory Installation
ud83duded2 RECOMMENDED PRODUCTS
Toilet Repair Kits
Keep a repair kit stocked u2014 toilet calls come without warning at midnight.
The golden rule is to install accessories from top to bottom:
- Wall shelf
- Towel ring
- Toilet paper holder
- Washlet (electronic bidet seat)
- Outlet cover plate u2014 last of all
The reason: if you install the lower items first, they get in the way u2014 or get scratched u2014 when you go to work on the upper ones.
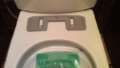
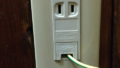
Installing the Washlet
Fitting a washlet is surprisingly straightforward:
- Set the mounting plate on the toilet rim (two bolts)
- Slide the washlet body onto the plate and lock it in
- Attach the diverter valve to the shut-off valve (splicing a branch fitting into the existing supply line)
- Plug the power cord into the outlet
- Turn on the water and check for leaks
- Test all functions
The diverter valve is the critical step. Check the thread size of your shut-off valve in advance and buy a matching diverter before you start. ^ ^
Silicone Caulking Around the Toilet Base
ud83duded2 RECOMMENDED PRODUCTS
Toilet Accessories Sets
Matching accessories cost u00a52,000 and make a small toilet feel designed.
Apply silicone caulk along the joint between the toilet and the floor. This isn’t just cosmetic u2014 it also keeps dirt and water from working their way under the bowl.
Steps before caulking:
- Protect the area around the toilet base with masking tape
- Run a smooth, even bead of silicone caulk
- Smooth it with a finger (or a dedicated spreader tool)
- Remove the masking tape immediately u2014 before the caulk skins over
Because this is a wet area, use silicone caulk with a mould-inhibiting formula. Modified silicone can be painted over, but for the toilet base pure silicone is perfectly adequate.
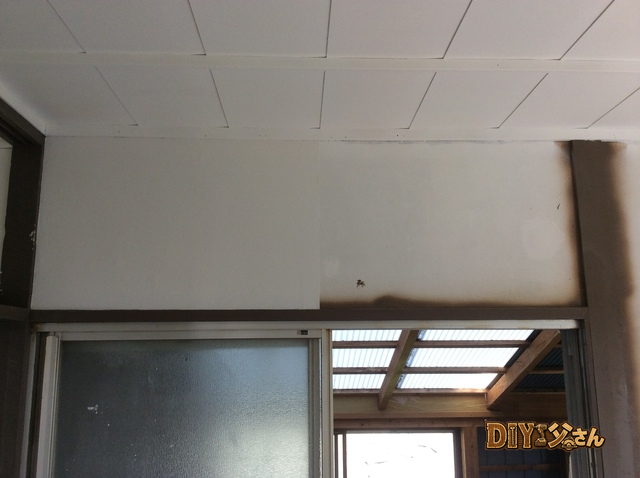
Wall Shelf Installation
I installed a wall-mounted shelf to hold spare toilet paper rolls and a few small items. The shelf brackets are fixed to the wall with anchor bolts.
Important note for diatomaceous earth walls: diatomite plaster is brittle. Over-tighten the anchor screws and the plaster will crumble. Tighten by hand, then give the screws just a little extra snug u2014 that’s all you need.
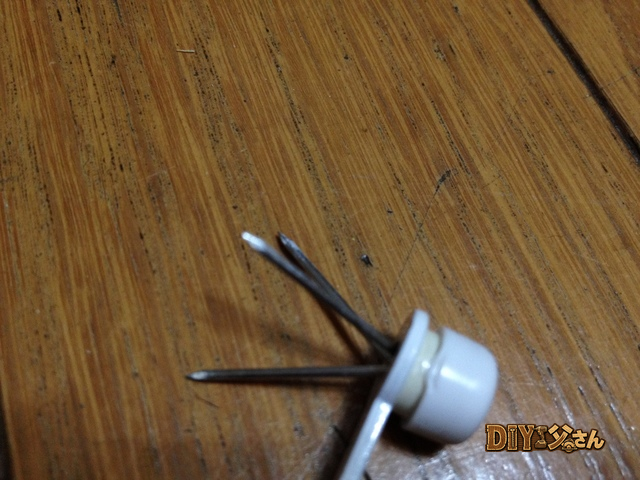
For this installation I chose a shelf with an interesting fastening system: very thin nails driven into drywall at alternating angles so that each nail locks the others against pull-out.
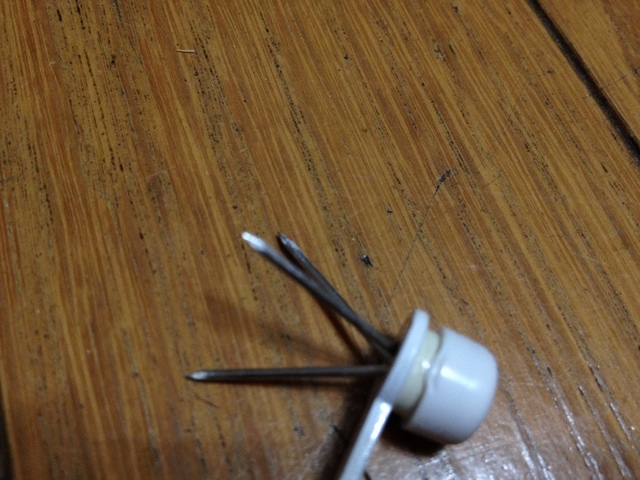
The nails. Each one by itself has almost no pull-out strength, but by driving them at opposing angles they work together to support a rated load of 3 kg. Brilliant concept.
One more advantage: the holes left behind after removal are tiny. That said, by the time this article was rewritten, low-cost plastic drywall anchors have become widely available and offer better load capacity for the price u2014 they’d be my first recommendation today.
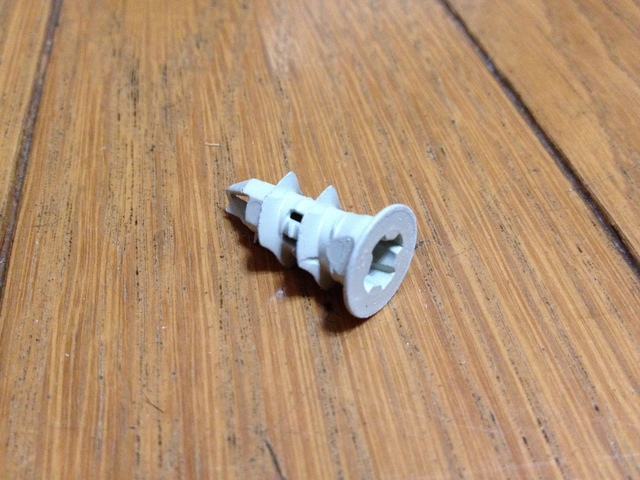
A standard drywall anchor. Hardware keeps improving u2014 always fun to see what comes next.
Wall shelf installed. ^ ^
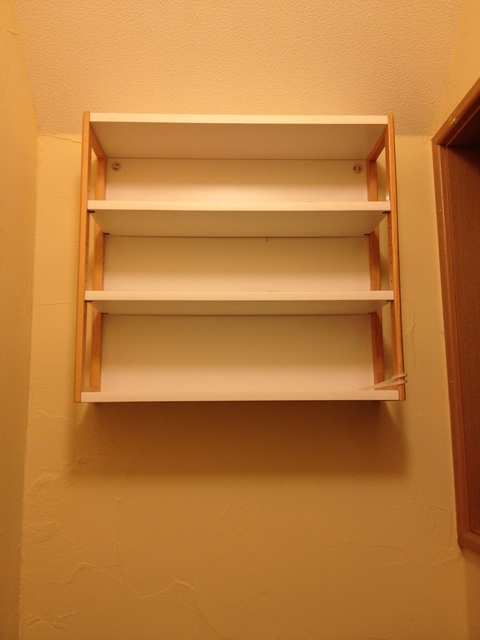
The finished wall shelf. Doesn’t it sit beautifully against the diatomite plaster? DIY Dad is very pleased.
Toilet Renovation Complete u2014 Thoughts from a Landlord
The transformation: old squat toilet u2192 modern western-style toilet with washlet + wainscoting + diatomite plaster walls. The reaction from prospective tenants during viewings? “This toilet is amazing u2014 so stylish!” ^ ^
Total material cost for the toilet renovation: approx. u00a5120,000 (toilet bowl u00a580,000 + wainscoting u00a530,000 + cushion flooring/diatomite plaster etc. u00a510,000). A contractor’s estimate for the same work came in at u00a5400,000u2013u00a5600,000. DIY made it possible at a fraction of the cost.
ud83dudebd Thinking About a Toilet Renovation?
Even just replacing the toilet bowl makes a dramatic difference to the feel of the room. Upgrading to a modern toilet with a built-in washlet is a change DIY Dad has applied to every property in his portfolio. ^ ^
24-hour emergency plumbing u2014 Water Rescue Squad u00bb
Marutoku Shop | Wainscoting panels and timber u2014 order by the piece u00bb
ud83dudcda Toilet Renovation Series u2014 22 of 25
u2190 Toilet Renovation Vol.21: Accessories Installation u00b7 Series Index u00b7 Toilet Renovation Vol.23: Washlet Installation u2192
DIY Renovation Quote Review Manual
How to read, compare, and negotiate contractor quotes. This manual saved me u00a5800,000 on a single renovation project.
ud83cudfe0 More from DIY Father
15 years of landlord experience u00b7 3 apartment buildings u00b7 DIY renovations that saved millions of yen. Browse all articles at diytosan.com